• Skip to primary navigation
  • Skip to main content
  • Skip to primary sidebar
Lisa Coop logo
  • Recipes
  • COACHING
  • COOKBOOK
  • FASTER WAY
    • FASTer Way to Fat Loss
    • FASTer Way FAQ
    • Client Testimonials
  • about
  • Nav Social Menu

    • Facebook
    • Instagram
    • Pinterest
menu icon
go to homepage
subscribe
search icon
Homepage link
  • RECIPES
  • COACHING
  • COOKBOOK
  • ABOUT
  • LET'S KEEP IN TOUCH
    • Facebook
    • Instagram
    • Pinterest
  • ×

    Blog

    Surviving Summer Series - Work Out Edition

    Jun 15, 2022 ·

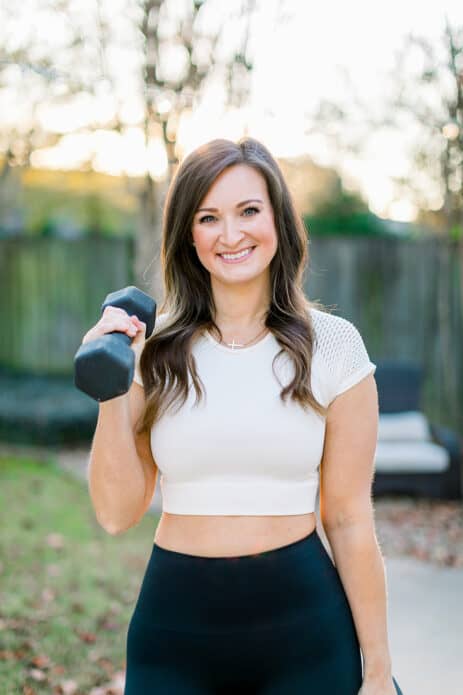
    I am excited to introduce my Surviving Summer Series to help you navigate your health and wellness goals during the busy summer! As a busy mom, it can feel challenging to figure out when to complete your workouts, especially during summer! With the kids at home and schedules being different, you might be quick to think there's no way to get fit and healthy during the summer. But don't be too quick to give up. Here are some ways you can stay active when the kids are home and need you all of the time. (Who else feels like all they do is feed the kids every hour! 🤣)

    TOP TIPS to stay on track with workouts this summer

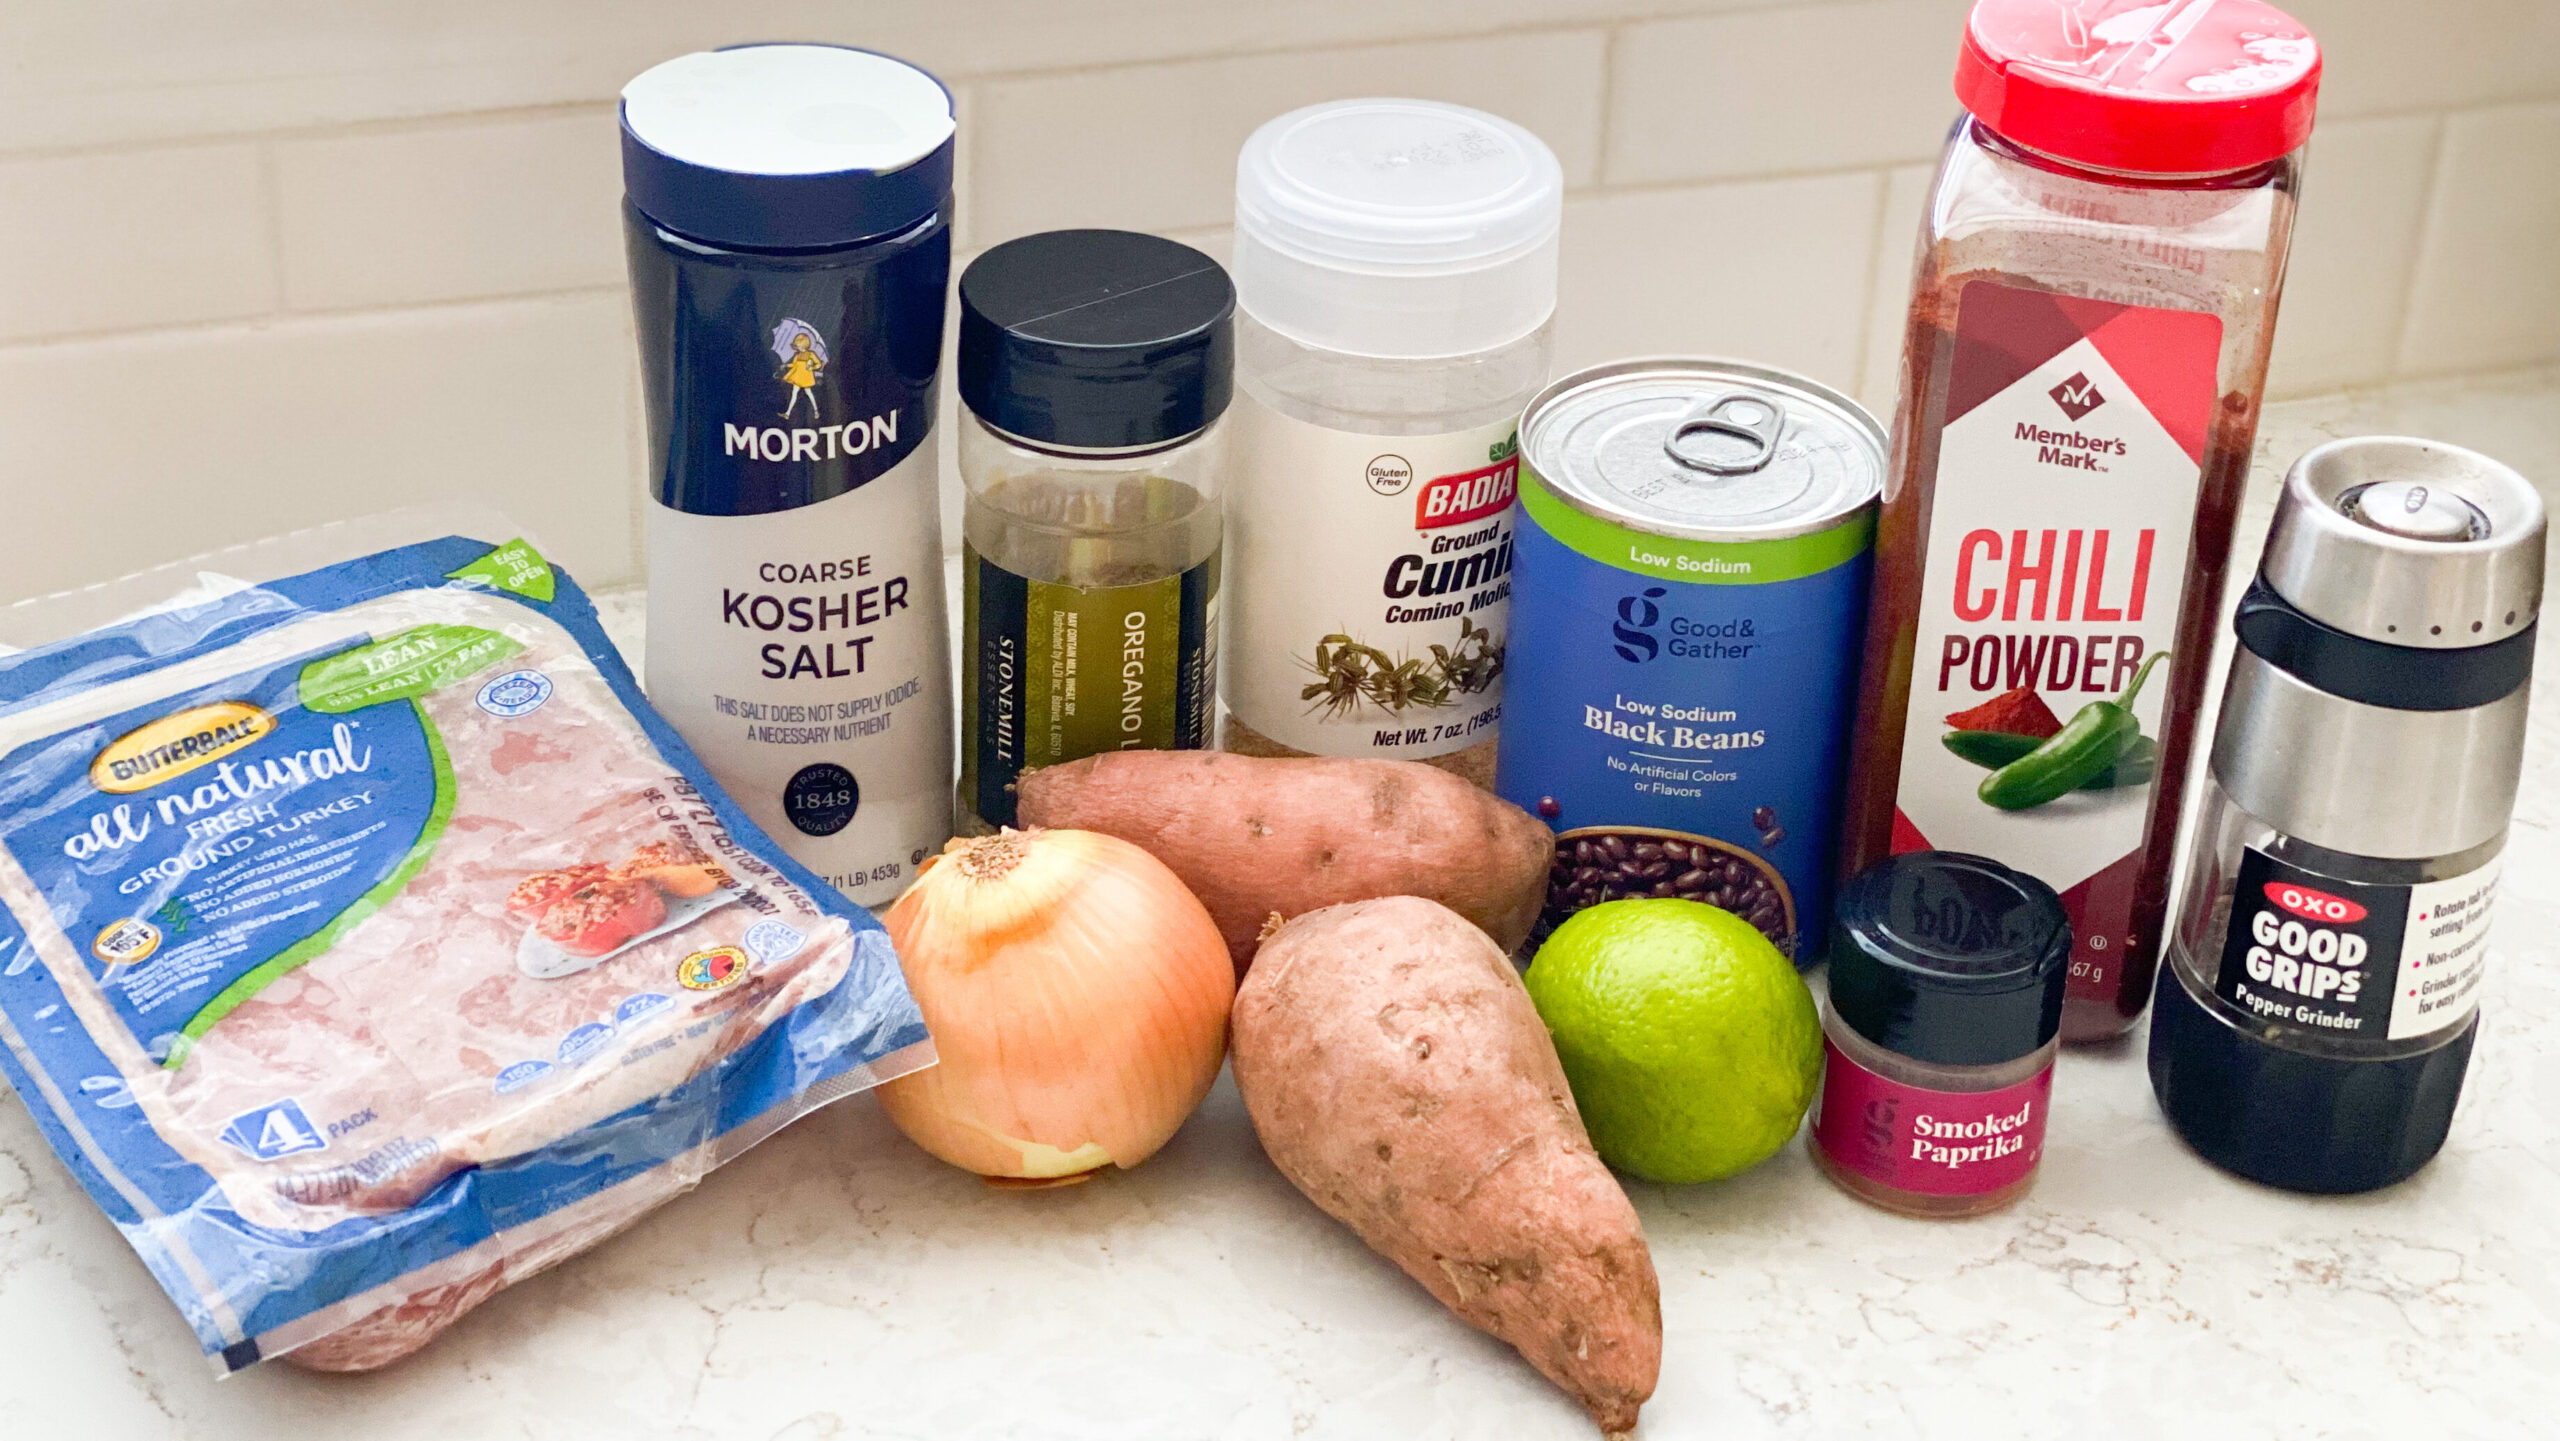
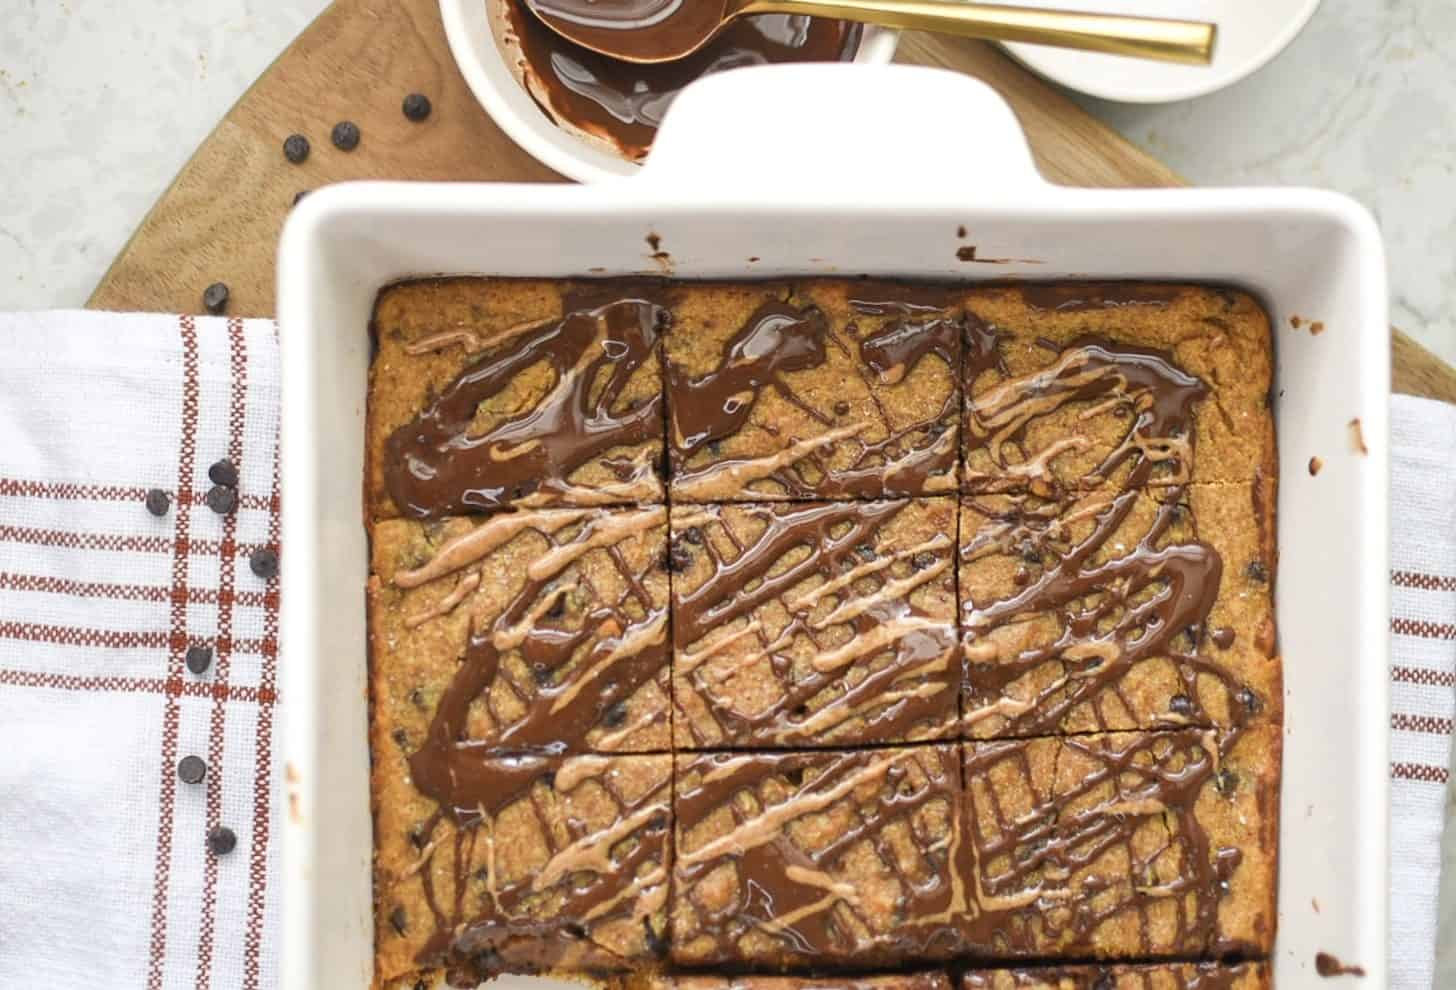
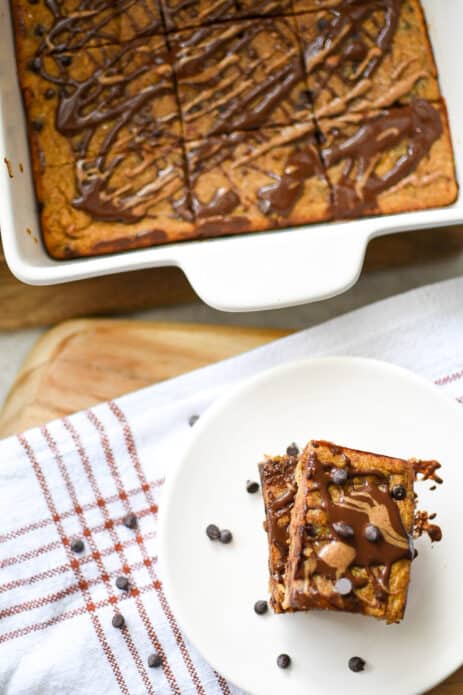
    1️⃣ Workout while they are sleeping. Either get up before the kids do or push play while they are napping. I try to get my training done early in the morning while my kids watch a little tv or eat their breakfast. Need a quick make-ahead breakfast? Try my favorite Breakfast Casserole, perfect to heat up in the microwave!

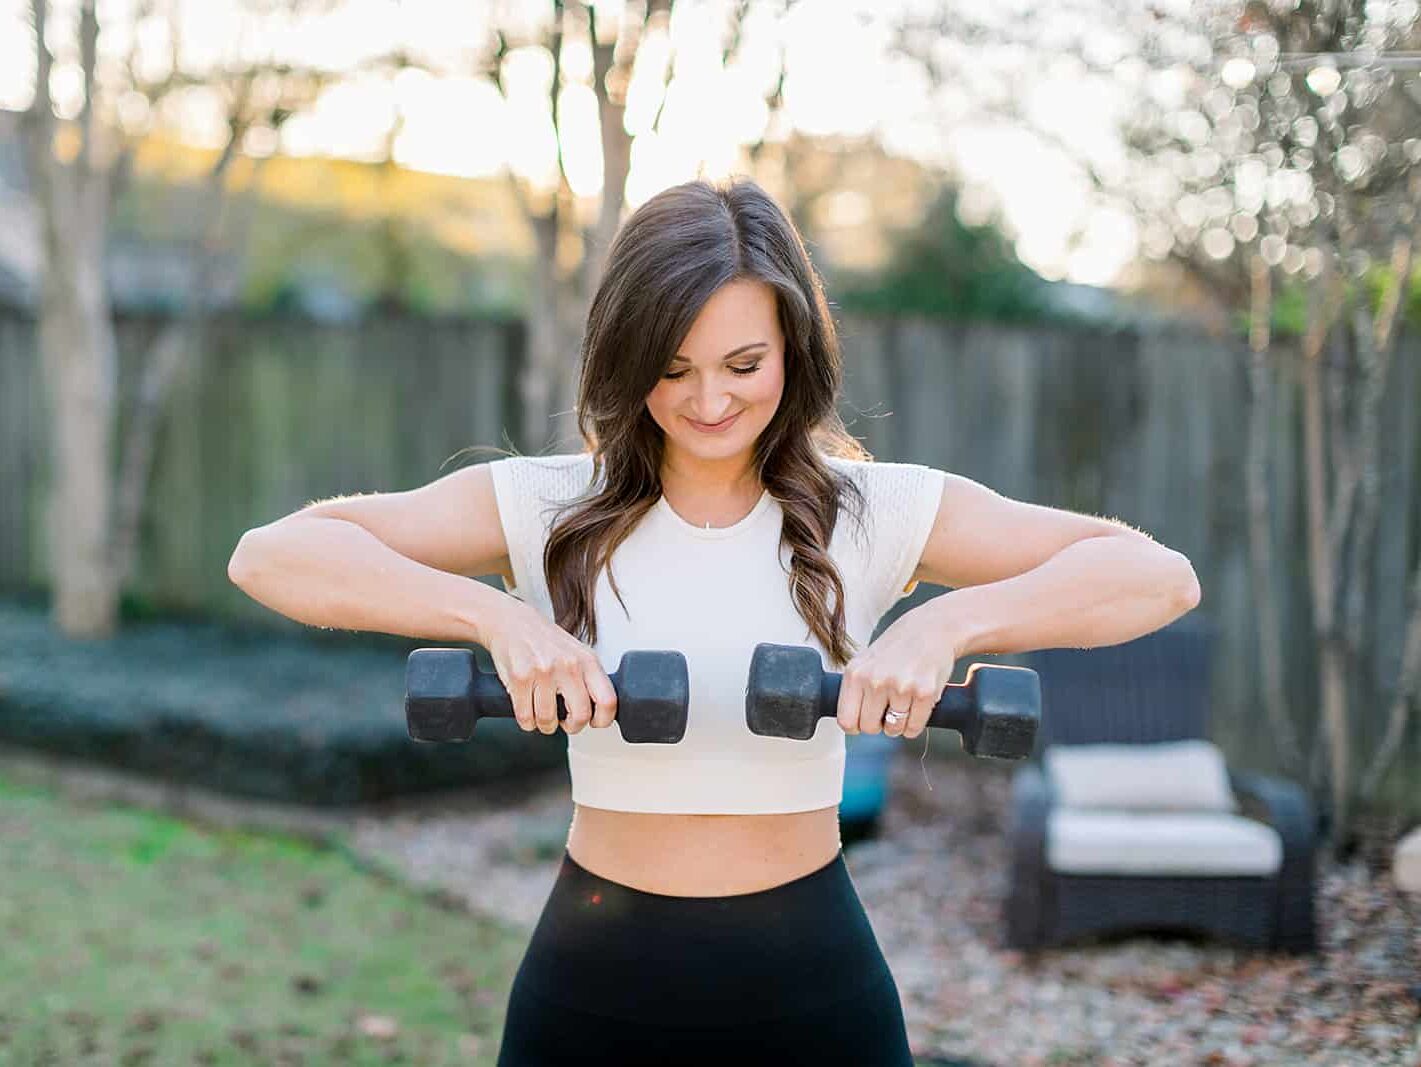
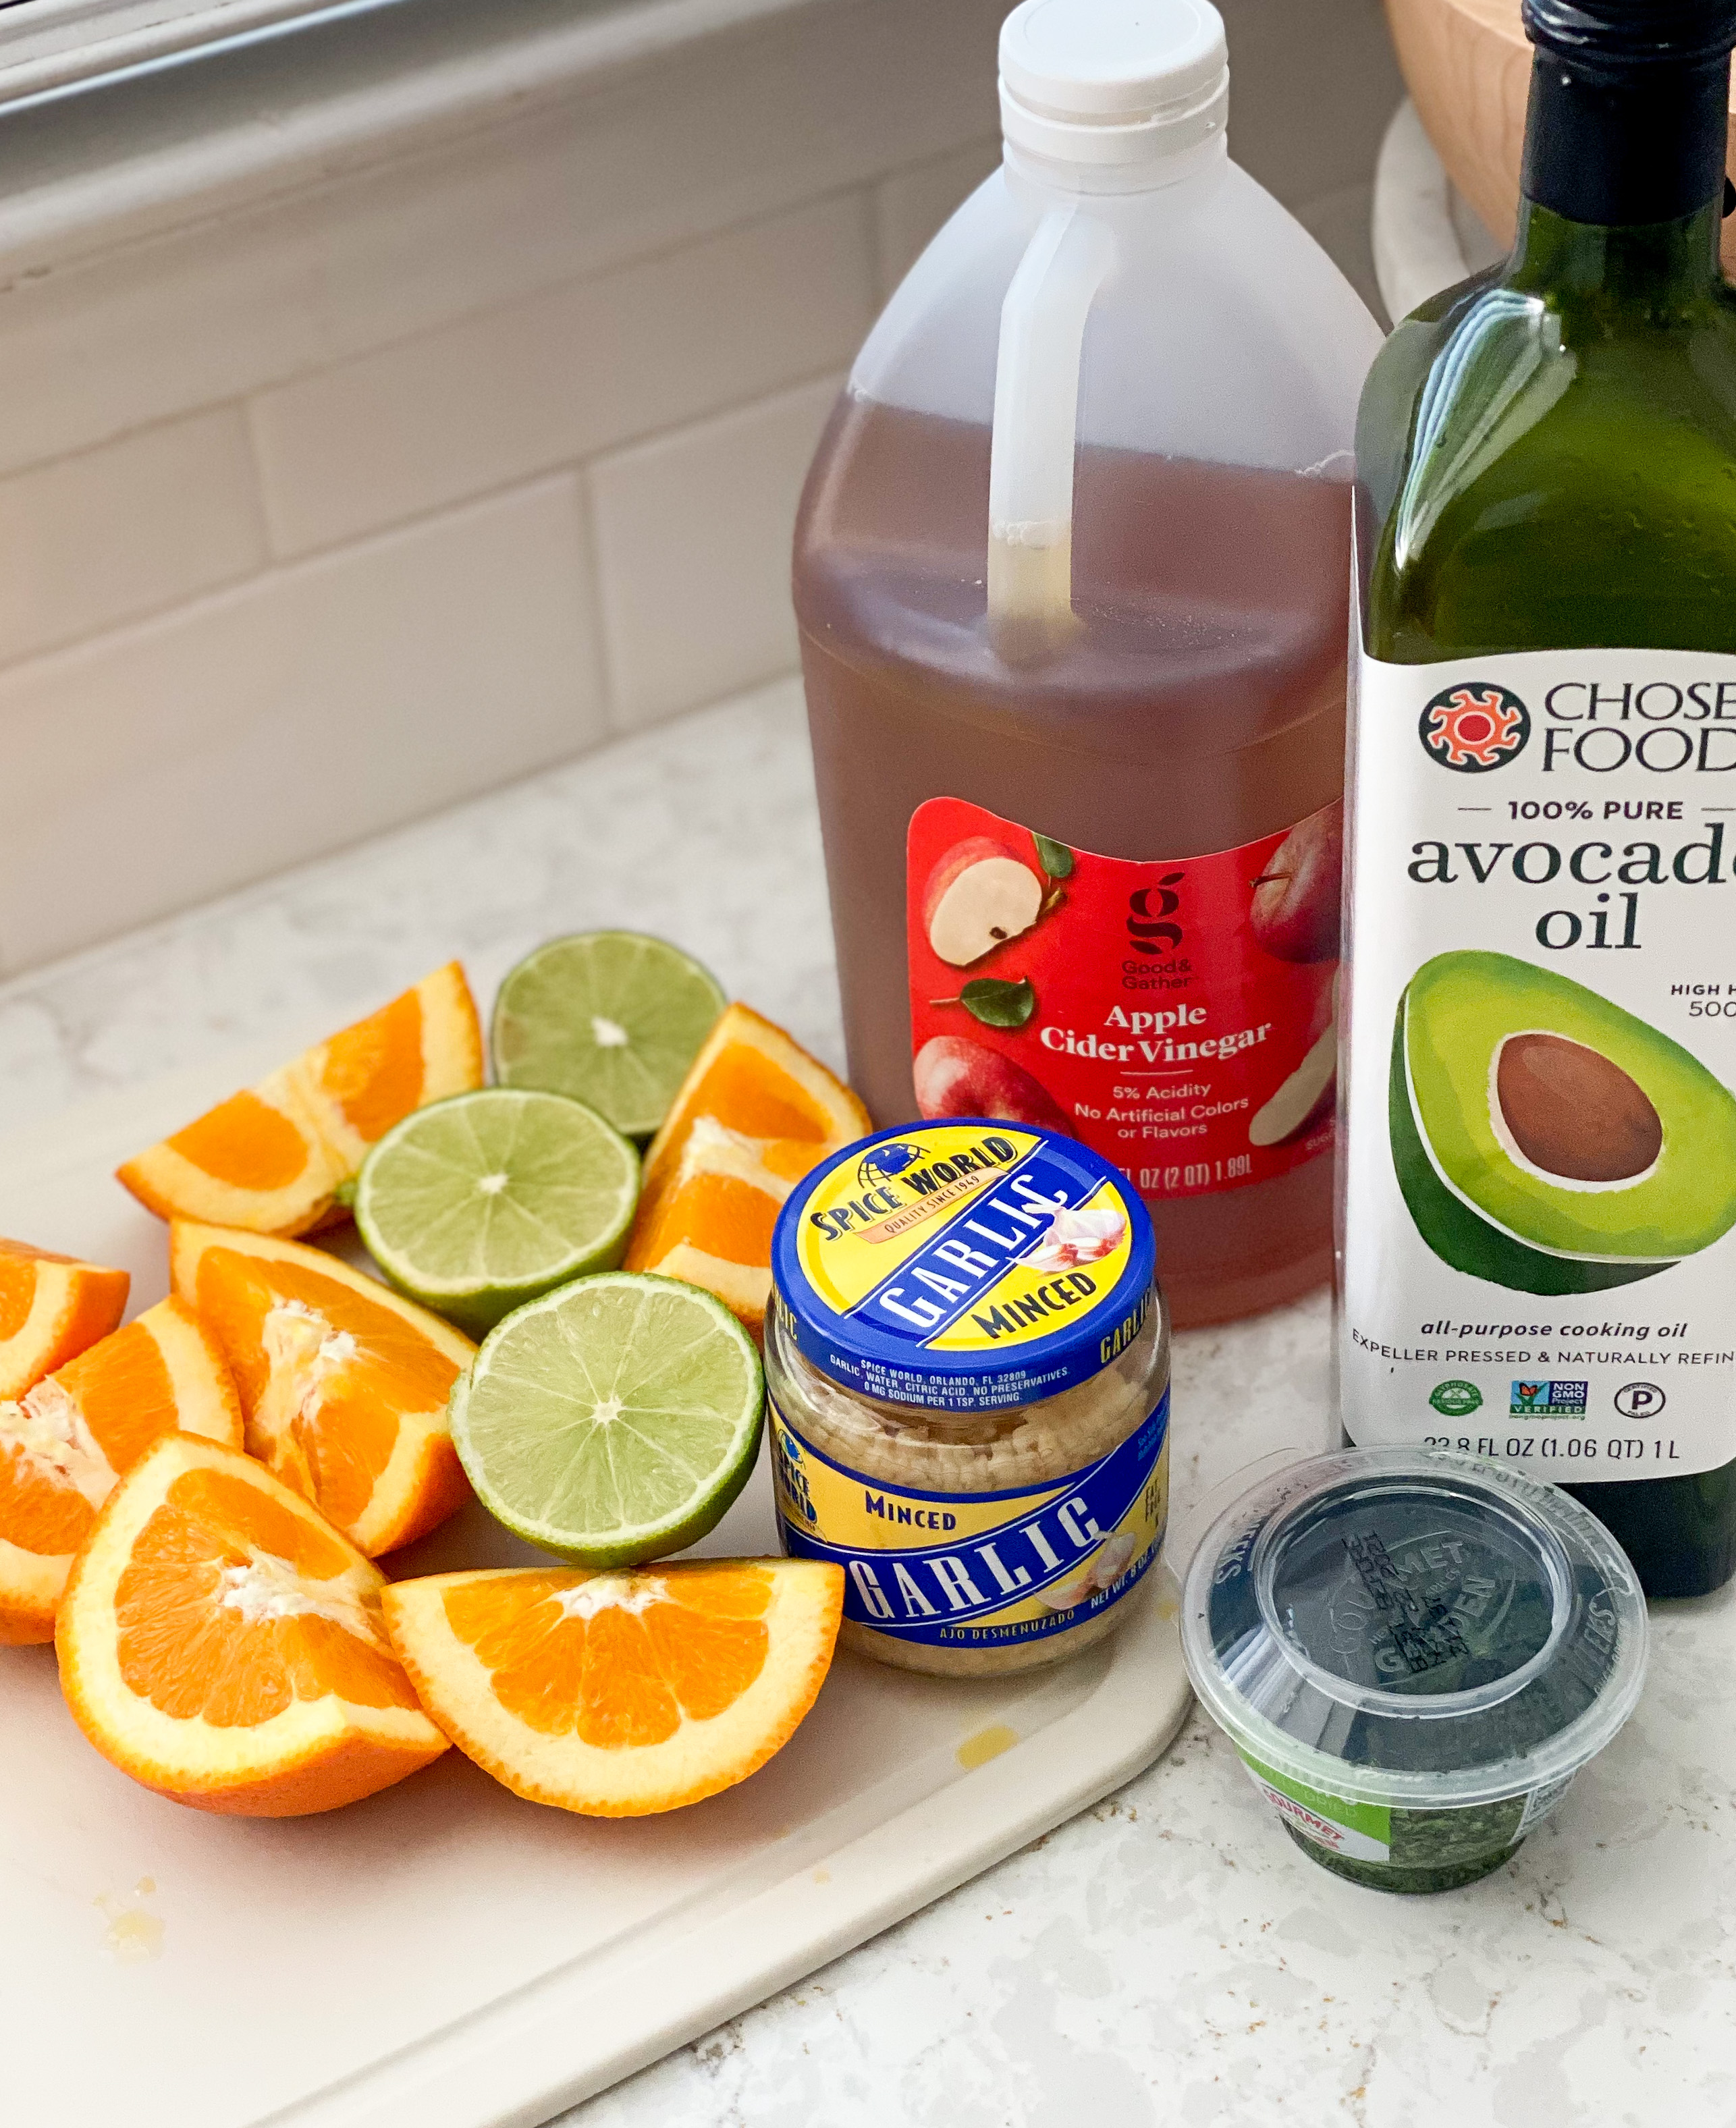
    2️⃣ Include the kids in your workouts. Get outside on walks or bike rides and take the kids with you. Be flexible about what you consider exercise. Maybe you jump on the trampoline, play tag in the yard, or have races in the pool. Any activity is good for you, and who knows, you might create some fun memories too. Not seeing changes to your body as you want? Check out what exercises I recommend for my clients in this blog post.

    3️⃣ Break up your workout throughout the day. Especially if you are having a hard time finding a block of 30 minutes. Try doing 10 minutes 3 times per day. A set of squats, lunges, and pushups can be completed relatively quickly. But, again, be flexible, the days are long, but the years are short. It won't be forever that you are needed 24/7 as a mom. 

    4️⃣ Swap babysitting with a friend. You watch her kiddos, and then she'll watch yours. Plus, you can encourage and support one another. Win, win! 

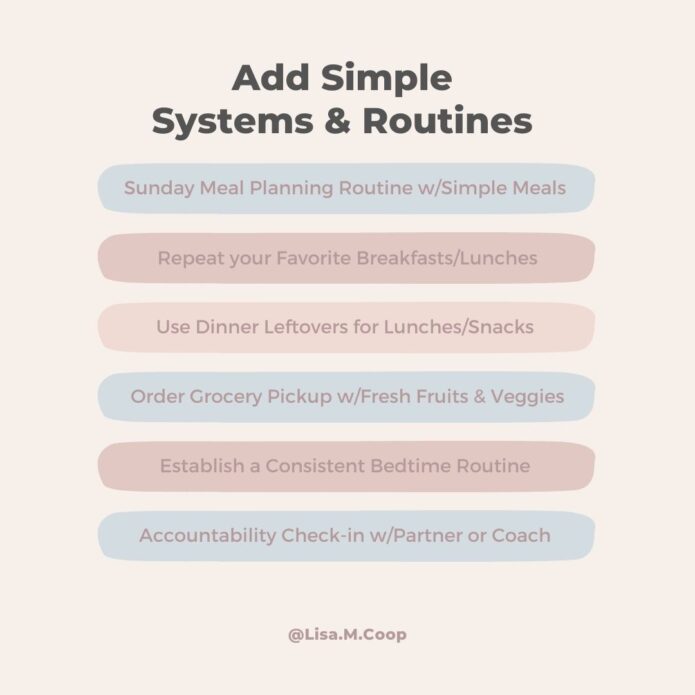
    5️⃣ Teach older children to have a morning routine. Older kids can create a morning routine to complete morning chores, work on summer reading, or complete summer work assignments. Plan to complete your workout and meal prep during this time. This teaches them a valuable skill they can use for life. Plus, they see you modeling a morning routine in action. They'll see you making your health a priority!

     Lisa Coop FASTer Way Coach and mom surviving summer as a busy mom.

    You can survive the summer!

    Having the kids home for summer can be a wonderful break in routine. You don't have to give up on your fitness and nutrition goals because they are around. Instead, you can show them that living healthy can be done in simple & sustainable ways. Stay tuned for my next post, Surviving Summer Series: Kid Food Edition.

    If you are looking for help with your fitness and nutrition, grab a spot in my next FASTer Way group!

    Learn More

    Cardio could be preventing your fat loss. Are you guilty?

    May 4, 2022 ·

    I get DMs all of the time. "How can I get a leaner body? I am doing everything right, but I can't seem to lose body fat, especially around my midsection." And when I dig a little deeper, I find out these frustrated women are actually approaching fat loss all wrong.

    The truth is if you want to lose body fat, you need to skip the cardio class and wander over to the weight side of the gym. Now, I am not saying cardio isn't great for your heart. And I know as a busy mama, sometimes, I need to get out of the house so I can destress and recharge. And a walk/run is exactly what I need.  

    But what I am saying is if you want to change the shape of your body, lean out, and improve your overall energy, you need to focus on building lean muscle. You do this by eating the right amounts of the right foods AND by adding resistance training, not cutting calories, and adding more cardio sessions. 

    Macro Coach Lisa Coop writes about how strength training is one of the best tactics to lose body fat.

    4 REASONS TO GIVE STRENGTH TRAINING A TRY

    1️⃣ Strength training can improve your mood and mental health. Lifting weights can be an empowering experience for you. As you get stronger you might find your confidence and self-esteem grow too. I see this all of the time with my clients! 

    2️⃣ Strength training can help you shed fat faster! Lifting weights helps you burn more calories. As you increase your muscle mass, your body burns more calories even at rest, so as you build more muscle you tap into more of your fat stores and you can say bye-bye to stubborn fat. 

    3️⃣ Strength training can improve your cardiovascular health. A study published in the Medicine & Science in Sports & Exercise found individuals who participated in strength workouts for at least one hour per week had a 40  to 70% lower risk of heart attacks. 

    4️⃣ Strength training can improve and help you maintain healthy bones, which is super important, especially for women. Studies have shown that lifting weights not only slows bone loss it can help rebuild it too.

    If you know long cardio sessions aren't giving you the leaner body you want, download my Macros Made Simple guide. You'll learn how to properly balance your food and work WITH your body instead of against it.

    Tired of using the wrong strategies to get a body you feel proud in? Join my next FASTer Way Coaching Group!

    Join My Next Group

    3 Ways to Love Yourself Leaner

    Mar 7, 2022 ·

    Summer is quickly approaching, and rather than you dreading this time of year, I want you to learn how to LOVE yourself, and feel AMAZING in your shorts, tank tops, and swimsuits this year!

    Let me guess you've...

    • read all the diet books and articles. 
    • counted points and calories feeling restricted and deprived. 
    • tried pre-packaged meals and shakes and you were able to choke them down. Well, until you couldn't anymore. 

    It feels confusing, frustrating, and downright impossible to figure out what actually works to get a lean, strong body full of energy. Maybe you've just given up completely and have embraced the extra layer of fluff you are carrying around. I mean body positivity, it's an amazing thing for sure. 

    But it's hard. When you look at your own eyes in the mirror, you know you were made for more than this ridiculous cycle that's taking a toll on your self-esteem. You are a smart woman, for goodness sake! 

    What if there were a different way to lose weight and get healthy?

    What if you could gain control of your nutrition and understand how to use exercise to change the shape of your body - all in a way that grows your self-confidence. 

    Does it sound impossible? Hear me out. 

    Your old go-to of eating less and exercising more, along with your list of punitive rules that demand extreme willpower are crushing how you feel about yourself. No wonder you can't sustain your efforts.  

    Ready to love yourself leaner?

    1. Drop ALL OR NOTHING thinking. Excellent health, a leaner body, and building strength take consistency. Find small ways to show up for yourself and your health goals each day. ❤️

    2. Embrace Your Mistakes.❤️  To get the results you've never had, you will have to become someone you've never been. In reality, you will mess up A LOT when learning new habits and building a new healthy lifestyle. It's not the mistake that derails you. It's the fact that you allow one mistake to turn into a week of eating poorly and skipping your workouts. Learn from your mistake. And be patient and get right back to becoming a healthier person

    3. Enjoy the process! Have you delayed feeling great or confident until you reach a specific size or goal?  Habit guru BJ Fogg (you know the guy who studies this stuff for his job) explains that change is better when people feel good and not bad. If you've are a person who has struggled to keep a healthy lifestyle going, you need to build a little more fun into the process. Through accountability and support, my clients enjoy working on themselves. They participate in challenges, connect and encourage others on the same journey, and love the healthy person they are becoming.

    You can choose something different.

    Life is busy, you have a lot on your plate, please don't waste any more time program hopping and sitting in overwhelm. I want you to feel empowered and find consistency in your nutrition and fitness. If you want a clear action plan to succeed, along with accountability and support--->plus a fun group to cheer you along, grab a spot in my next coaching group.

    JOIN MY NEXT GROUP

    Need some ideas on how to level up your nutrition? Grab my free guide, Macros Made Simple and get started today!

    DOWNLOAD MACROS MADE SIMPLE

    Ground Turkey Sweet Potato Skillet

    Feb 4, 2022 ·

    This healthy ground turkey sweet potato skillet is a 20 minute meal that you can truly customize to fit your mood or preferences. This dish marries the sweetness of the roasted sweet potatoes with southwestern spices to create a robust flavor that is sure to please.

    white skillet with ground turkey mixed with roasted sweet potatoes and topped with chopped cilantro

    The beautiful thing about this simple dish is the flexibility of it. I originally created it as an easy bowl meal to incorporate all three macros (carbs, fat, and protein), but then it morphed into some of the best tacos I have ever had! You can do so many things with this dish!

    Ingredients for this Ground Turkey Sweet Potato Skillet

    package of ground turkey, salt, onions, two sweet potatoes, oregano, cumin, can of black beans, lime, chili powder, smoked paprika, and black pepper

    Here is what you need to make this easy meal:

    • Ground turkey
    • Onion
    • Sweet potatoes
    • Lime
    • Black beans
    • Avocado oil
    • Minced garlic
    • Chili powder
    • Cumin
    • Smoked paprika
    • Oregano
    • Kosher salt
    • Pepper
    • Cilantro (optional)
    white bowl filled with cooked ground turkey and roasted sweet potatoes, topped with chopped cilantro with gold fork in bowl

    How to make it

    First step to this meal is to chop and roast your sweet potatoes. If you are in a real time pinch, grab some pre-chopped sweet potatoes from the store.

    Toss your chopped sweet potatoes with half the avocado oil, half the lime, juiced and salt and pepper. You can roast these in the over or use an air fryer. I usually use my air fryer, but either way works beautifully.

    Now, it's time to cook the turkey.

    While your sweet potatoes are roasting, go ahead and heat the remaining oil in a skillet over medium heat. Add your chopped onions to the oil and cook for about 3 minutes. When the onions begin to turn translucent, add the ground turkey to the skillet and cook until no longer pink.

    When turkey is cooked, add in the spices and beans to the cooked turkey and onions. Stir to combine well.

    When sweet potatoes are nice and roasted, add those to the skillet with the turkey and onions, and give it a good stir to combine everything nicely. Lastly, juice the remaining half of lime over the skillet, and stir.

    Ways to serve this Ground Turkey Sweet Potato Skillet

    A simple bowl meal - this combination of ingredients serves you a healthy bowl full of nutritious carbs, fat and proteins. This dish is perfect as is!

    Tacos - my favorite was to eat this dish is in corn tortillas topped with a southwestern flavored sauce. SO GOOD!

    Over greens - this dish is perfect to enjoy over you favorite bed of greens. Top it with your favorite sauce or dressing and boom, an easy and delish way to pack in more greens!

    Over rice or quinoa - a great way to boost those healthy carbs and fiber is to enjoy this dish over rice or quinoa.

    white bowl filled with cooked ground turkey and roasted sweet potatoes, topped with chopped cilantro with gold fork in bowl, sitting beside skillet filled with turkey and sweet potato mixture

    Need more easy and healthy bowl meal ideas!? Check these out!

    • Baked Steak Fajita bowl
    • Air Fryer Sausage & Veggie bowl
    • Sweet and Spicy Chinese Chicken bowl

    Ground Turkey Sweet Potato Skillet

    This healthy ground turkey sweet potato skillet is a 20 minute meal that you can truly customize to fit your mood or preferences. This dish marries the sweetness of the roasted sweet potatoes with southwestern spices to create a robust flavor that is sure to please.
    Print Pin
    Course: Main Course
    Cuisine: Mexican, Southwestern
    Keyword: bowl meals, dairy free, Family dinner, gluten free, one pan meals
    Prep Time: 5 minutes
    Cook Time: 20 minutes
    Servings: 6
    Calories: 281kcal

    Ingredients

    • 2 pounds ground turkey
    • 2 medium sweet potatoes, peeled and diced
    • 1 lime, juiced (divided)
    • 1 onion, chopped
    • 1 tablespoon avocado oil, divided
    • 1 ½  teaspoon kosher salt, divided
    • 1 teaspoon pepper, divided
    • ½ cup black beans, drained and rinsed
    • 2  teaspoons minced garlic
    • 1 ½ teaspoons chili powder
    • 1 ½ teaspoons cumin
    • 1 teaspoon smoked paprika
    • 1 teaspoon oregano
    • ¼ cup cilantro, chopped (optional)

    Instructions

    • Preheat oven OR air fryer to 425°
    • If using the oven, line baking sheet with parchment paper.
    • Combine ½  tablespoon avocado oil, lime juice, ½ teaspoon salt, and ½ teaspoon pepper in large bowl.
      1 tablespoon avocado oil, divided, 1 ½  teaspoon kosher salt, divided, 1 teaspoon pepper, divided, 1 lime, juiced (divided)
    • Toss diced sweet potatoes with mixture in the mixing bowl, and stir to coat evenly.
      2 medium sweet potatoes, peeled and diced
    • Place coated sweet potatoes on lined baking sheet if using the oven.
    • Place sweet potatoes in pre-heated oven OR air fryer.
    • Bake OR air fry for 20-25 minutes, until tender and slightly browned.
    • While the sweet potatoes are roasting, heat remaining ½ tablespoon oil in large skillet over medium heat.
      1 tablespoon avocado oil, divided, 1 onion, chopped
    • Cook onions for about 3 minutes until turning slightly translucent, then add in the ground turkey to the skillet.
      2 pounds ground turkey
    • Cook the turkey and onions until turkey is no longer pink.
    • Add spices and beans to the turkey and onion mixture, and stir to combine well.
      1 ½  teaspoon kosher salt, divided, 1 teaspoon pepper, divided, ½ cup black beans, drained and rinsed, 2  teaspoons minced garlic, 1 ½ teaspoons chili powder, 1 ½ teaspoons cumin, 1 teaspoon smoked paprika, 1 teaspoon oregano
    • Add roasted sweet potatoes to the pan with turkey, stir to combine.
    • Sprinkle with chopped cilantro (if desired) and serve!
      ¼ cup cilantro, chopped (optional)

    Notes

    To easily track these macros is the My Fitness Pal app, search the app for "Lisa Coop Ground turkey sweet potato skillet."

    Nutrition

    Serving: 1cup | Calories: 281kcal | Carbohydrates: 23g | Protein: 27g | Fat: 10g | Fiber: 5g

    How to Overcome Lack of Willpower

    Jan 28, 2022 ·

    It is not necessarily a willpower problem.

    female with brown hair wearing white shirt lifting a dumbbell in each hand

    We are mid-way through January and it's about the time when people's willpower and motivation begin to decline. The excitement of a new plan or program can start to wear off. Especially if you are trying to make too many changes at once. 

    If you are starting to think this healthy eating thing is for the birds, I encourage you to think SIMPLE. The secret to sustaining your new healthy wellness efforts is to combat a lack of motivation with the help of simple systems and routines!  

    Combat a Lack of Willpower with Systems & Routines.

    Here are some systems & routines that you might want to add to gain traction towards your goals:

    • A Sunday meal planning routine with simple dishes.
    • Repeat your favorite breakfasts or lunches a couple times a week.
    • Use dinner leftovers for lunches.
    • Put leftovers into glass serving dish, so lunch is ready for you.
    • Order grocery pick up so you have fresh foods in the house.
    • Take your vitamins while your coffee is brewing.
    • Layout your workout clothes the night before so you are ready to go.
    • Establish a consistent bedtime routine and make sure you are getting 6-9 hours of sleep each night.
    • Set up an accountability check-in with a partner or coach.
    • Celebrate on Fridays all the awesome things you did for yourself the past week.
    Willpower Busters

    Your willpower is like a battery and it can run low. Don't rely on willpower alone, set yourself up for success with simple systems and routines.

    Need simple healthy meals your entire family will love? Download my Weeknight Family Favorites.

    Download Weeknight Family Favorites Recipe Guide

    Not sure what you should be eating to look and feel your best? Grab my Macros Made Simple Guide and learn a simple system to take control of your nutrition.

    Macros Made Simple Guide

    Do you have a system or a routine that helps you stay consistent when your willpower is low?

    Baked Steak Fajitas

    Jan 21, 2022 ·

    These easy baked steak fajitas is a 20 minute healthy dinner that you want to get on your dinner menu ASAP! This easy recipe is bursting with flavor, but uses just a few simple ingredients, and its super versatile! It works beautifully for a low carb meal or just add rice or tortillas for some carbs!

    white saute pan sliced steak, peppers, onions, and limes with white bowl beside it containing sliced steak peppers and onions over cauliflower rice

    Your simple ingredients:

    • Flank steak
    • Bell peppers
    • Onion
    • Avocado oil
    • Worcestershire
    • Garlic powder
    • Cumin
    • Salt
    • Pepper
    • Smoked paprika
    • Crushed red pepper
    sliced steak, peppers and onions on flour tortillas with limes, avocado, and cilantro

    How to make Baked Steak Fajitas:

    First step: Make the marinade. Combine the oil, worcestershire, garlic powder, cumin, salt, pepper, smoked paprika, crushed red pepper, salt and pepper in medium mixing bowl, Whisk well to combine the ingredients, then pour into a gallon sized ziploc bag.

    Next, slice the steak into thinly sliced pieces. Place the sliced steak in to the ziploc bag with the marinade.

    After slicing the steak, slice your peppers and onions into thin slices, and add to the ziploc bag with the marinating steak. Let the steak, peppers and onions marinate in the refrigerator for at least 4 hours, up to overnight.

    When you're ready to bake:

    When done marinating, take out the ziploc bag and let the steak and peppers sit at room temperature for 30 minutes before baking.

    Preheat oven to 425°. Line a large baking sheet with parchment paper.

    Pour the steak, pepper, and onions out of ziploc bag onto the baking sheet lined with parchment paper. Spread the mixture out evenly on the pan, trying not to overcrowd the slices of steak.

    Bake for 20 minutes, turning half way through.

    How to eat Baked Steak Fajitas

    These baked steak fajitas work perfectly for both low carb meal and a regular meal! To enjoy these fajitas for a low carb meal, enjoy them over cauliflower rice, make a steak fajita salad, or use a low carb wrap.

    To add in some carbs with these fajitas, enjoy over rice (cilantro lime is my favorite!), with tortillas (corn tortillas to keep it gluten free), or make a fajita quesadilla with beans, YUM!

    skillet filled with sliced steak, peppers and onions, beside a white bowl filled with cauliflower rice topped with sliced steak, peppers, onions, avocado, lime slice, and cilantro

    Need more quick weeknight dinner recipes?

    Check out these popular recipes!

    • Air Fryer Sausage and Veggies
    • Sweet and Spicy Chinese Chicken
    • Air Fryer Citrus Chicken Tenders

    Baked Steak Fajitas

    These easy baked steak fajitas is a 20 minute healthy dinner that you want to get on your dinner menu ASAP! This easy recipe is bursting with flavor, but uses just a few simple ingredients.
    Print Pin
    Course: Main Course
    Cuisine: Mexican
    Keyword: Easy dinner, low carb, quick, sheet pan meal
    Prep Time: 10 minutes
    Cook Time: 20 minutes
    Servings: 4
    Calories: 451kcal
    Author: Lisa

    Equipment

    • Parchment Paper

    Ingredients

    • 1 ½ pounds flank steak, thinly sliced
    • 1 red bell pepper, thinly sliced
    • 1 green bell pepper, thinly sliced
    • 1 orange bell pepper, thinly sliced
    • 1 onion, thinly sliced
    • ¼ cup avocado oil
    • ¼ cup worcestershire
    • 1 teaspoon garlic powder
    • 1 teaspoon cumin
    • ½ teaspoon kosher salt
    • ½ teaspoon pepper
    • ½ teaspoon smoked paprika
    • ½ teaspoon crushed red pepper

    Instructions

    • Whisk together oil, worcestershire, garlic powder, cumin, salt, pepper, smoked paprika, and crushed red pepper in mixing bowl to make marinade.
      ¼ cup avocado oil, ¼ cup worcestershire, 1 teaspoon garlic powder, 1 teaspoon cumin, ½ teaspoon kosher salt, ½ teaspoon pepper, ½ teaspoon smoked paprika, ½ teaspoon crushed red pepper
    • Pour the marinade into a large, gallon sized ziploc bag.
    • Slice flank steak into thin slices, then place in ziploc bag with prepared marinade.
      1 ½ pounds flank steak, thinly sliced
    • Thinly slice the bell peppers, and onion and add to the ziploc bag with marinating steak.
      1 red bell pepper, thinly sliced, 1 green bell pepper, thinly sliced, 1 orange bell pepper, thinly sliced, 1 onion, thinly sliced
    • Close ziploc bag, and refrigerate the steak and peppers for at least 4 hours, or up until overnight.
    • When you are ready to bake the fajitas, take the ziploc bag out of fridge and let sit at room temperature while the oven preheats.
    • Preheat oven to 425°.
    • Line large baking sheet with parchment paper.
    • Pour the steak and pepper mixture onto lined baking sheet, and spread the mixture evenly, being careful not to overcrowd the slices of steak.
    • Bake for 20 minutes, turning half way through, and enjoy!

    Notes

    To easily track the macros in the My Fitness Pal app, search for "Lisa Coop Baked Steak Fajitas."

    Nutrition

    Serving: 4oz | Calories: 451kcal | Carbohydrates: 13g | Protein: 37g | Fat: 28g | Fiber: 2g

    Macro Tracking - Your New Guardrail For Success

    Jan 10, 2022 ·

    Guardrails. Do you use them?

    macro tracking can be a great guardrail

    Get in the Driver's Seat with Macro Tracking

    I know when you are driving you probably don't even notice them, guardrails. Guardrails allow us to feel safe. They make sure we don't veer too far off our designated path. I've been thinking a lot about guardrails and how they can help you set yourself up for success when it comes to your nutrition and fitness. If you are hoping to make big gains in your fitness and nutrition this year, put a few guardrails in place.

    One of my favorite “guardrails” is macro tracking.

    Understanding how protein, fat, and carbs work in your body empowers you to make nutrition decisions that support your goals. The best part of knowing how to track macros is that you can be flexible with your nutrition habits - no matter what time of year it is. Let's be realistic, there are always parties, holidays, travel, and dinners out.

    Macro tracking puts you in the driver's seat of your nutrition. 

    Tracking Macros Is a Game-Changer

    Tracking macros has been a game-changer for so many of my clients and here's why:

    Consistency! You can track your macros no matter what you eat. Protein, Fats & Carbs. Even treats and indulgences can be worked in. No guilt!

    Flexible! You can dial-up or dial down your focus on depending on your circumstances and personal goals. ex: Super busy with work and the kids, you can decide to track only protein for a period of time.

    Simple! Counting macros helps simplify your food choices. Eat what you love if it fits your macros. Focus on foods that make you feel amazing. No need to overcomplicate the process!

    Feel Amazing! Traditional diets suggest exercising more and eating less. No fun! Feeling restricted and deprived will have you ready to quit! Macro-counting puts your focus on what you CAN eat, not on what you can't. Whew…that's doable and more enjoyable!

    Macros can influence your body composition, not just weight loss. And a leaner, stronger body is what you are after, amiright? Counting macros might be the guardrail you've been missing to make consistent progress, feel your best, and yes, look your best! 

    If you'd like to learn how to get started with macro tracking download my guide Macros Made Simple. You'll learn how to balance your food and reach your fitness and nutrition goals.

    GET THE GUIDE

    If you are ready to build guardrails the improve your fitness and nutrition, join my next FASTer Way to Fat Loss Coaching Group.

    JOIN MY COACHING GROUP

    Candied Pecan Chex Mix

    Dec 21, 2021 ·

    This candied pecan chex mix is such an easy and delicious holiday snack. It comes together with just a few ingredients, and serves as the perfect addition to your holiday charcuterie board!

    small white bowl and clear mason jar with pecan, cranberry, and chex mix inside of them

    What You Need for Candied Pecan Chex Mix:

    The ingredient list for this recipe is short, which makes this snack even better, right!? Grab these items from the store on your next visit so you can whip up this delish, but healthy-ish treat!

    • Avocado oil
    • Maple syrup
    • Pecan halves
    • Chex mix cereal ( I use both rice and corn)
    • Cinnamon
    • Salt
    • Dried cranberries
    clear mason jar with small twine ribbon tied around it, filled with pecan, chex mix and cranberry mixture

    Making this Pecan Chex Mix

    This yummy snack comes together in no time. Start off by combining the oil, syrup, and cinnamon in small pan over medium heat. Simmer, stirring occasionally until slightly thickened.

    While the syrup coating is simmering, pour the cereal, pecans and cranberries in to a large mixing bowl.

    After the maple syrup mixture has thickened, pour it over the chex mix in the large bowl, and stir until the mix is evenly and well coated.

    Pour the coated mixture onto baking sheet lined with parchment paper, ensuring it is all one even layer. Sprinkle salt on top of mix before baking.

    Bake for 8-10 minutes, turning halfway through. Let cool for at least 10 minutes before serving. The longer the mix cools, the crunchier it will be.

    clear mason jar with small twine ribbon tied around it, filled with pecan, chex mix and cranberry mixture sitting on white towel with pecan and chex mixture on towel

    This candied pecan chex mix is irresistibly scrumptious, and highly addicting, haha! However, 100% worth the splurge, and as always I have the macros pre-tracked for you in My Fitness Pal, so if you are actively tracking your macros, you can easily plug those in and stay on track with zero guilt!

    Looking for more healthy holiday snacks!?

    Check out this Gingerbread Protein Balls recipe!

    Candied Pecan Chex Mix

    This candied pecan chex mix comes together with just a few ingredients, and serves as the perfect addition to your holiday charcuterie board!
    Print Pin
    Course: Appetizer
    Cuisine: American
    Keyword: gluten free, snacks, sugar free
    Prep Time: 10 minutes
    Cook Time: 10 minutes
    Servings: 12
    Calories: 200kcal
    Author: Lisa

    Equipment

    • Parchment Paper

    Ingredients

    • ¼ cup pure maple syrup
    • 2 tablespoons avocado oil
    • ¼ teaspoon cinnamon
    • 2 cups pecan halves
    • ½ cup corn Chex Mix cereal
    • ½ cup rice Chex Mix cereal
    • ¼ cup dried cranberries
    • ¼ teaspoon salt

    Instructions

    • Preheat oven to 325°.
    • Line a baking sheet with parchment paper.
    • Combine avocado oil, maple syrup, and cinnamon in small sauce pan over medium heat.
      ¼ cup pure maple syrup, 2 tablespoons avocado oil, ¼ teaspoon cinnamon
    • Bring the maple syrup mixture to a simmer, stirring frequently, until mixture is slightly thickened.
    • While syrup mixture is simmering, combine the chex mix cereal, pecans, and cranberries in to a large mixing bowl.
      2 cups pecan halves, ½ cup corn Chex Mix cereal, ½ cup rice Chex Mix cereal, ¼ cup dried cranberries
    • After syrup mixture has thickened, pour it over all the cereal and pecan mix in the large bowl.
    • Stir well to evenly coat the mix.
    • Pour the coated mixture onto the baking sheet lined with parchment paper, ensuring to make one even layer.
    • Sprinkle the pecan and chex mix with salt.
      ¼ teaspoon salt
    • Bake at 325° for 8-10 minutes.
    • Allow to completely cool, at least 10 minutes before serving.

    Notes

    To easily track these macros in the My Fitness Pal app, search MFP for "Lisa Coop Candied Pecan Chex Mix"

    Nutrition

    Serving: 0.25cup | Calories: 200kcal | Carbohydrates: 12g | Protein: 2g | Fat: 16g

    If you try out this candied pecan chex mix, be sure to tag me on Instagram so I can see you enjoying it! And if you try it and love it, a 5 star rating and review below would mean the world to me!

    Dairy Free Breakfast Casserole

    Dec 20, 2021 ·

    This overnight, dairy free breakfast casserole makes breakfast a breeze! This healthy, macro friendly dish is gluten free, dairy free, and the perfect make ahead breakfast for holiday mornings, or when you have guests in town!

    Sausage and hashbrown breakfast casserole and strawberries on white plate with fork

    This is one of my go-to Christmas morning breakfasts. I love that I can make it ahead of time, just pull it out on Christmas morning, pop it in the oven while the girls open gifts, and when all the fun settles...breakfast is ready!

    What you'll need to make this breakfast casserole:

    • Turkey sausage
    • Eggs
    • Avocado oil
    • Onion
    • Shredded hashbrowns
    • Unsweetened coconut milk
    • Shredded cheddar, OR dairy-free cheddar
    • Salt
    • Pepper
    White casserole dish with cheesy, sausage breakfast casserole with bowl of fruit beside casserole dish

    How to make this Dairy Free Breakfast Casserole

    This easy breakfast comes together so quickly and easily. Simply, brown the sausage, then combine all ingredients in large bowl. Mix everything together, then pour in baking dish, cover, and refrigerate until it's time to bake it! So easy!

    Can Breakfast Casserole be Made Ahead?

    Yes! In fact, that is EXACTLY why this recipe is a favorite of mine! You can make this breakfast casserole up to 8-12 hours ahead of time.  My favorite way is to make it on Christmas Eve after dinner, then let it chill overnight and bake it Christmas morning! 

    Sausage hashbrown casserole on white plate with strawberries, and cup of black coffee and eggs in the background

    Is this Dairy Free Breakfast Casserole also Gluten-Free?

    Yes! This breakfast dish is a perfect option for those avoiding gluten and daily. This casserole is naturally gluten-free, and also dairy-free as long as you choose a dairy-free cheese. However, if you are not trying to avoid dairy, you can certainly use milk, and regular cheese as well.

    Looking for more healthy holiday recipes?

    Click here for my free guide of simple, delicious, and macro friendly holiday recipes!

    collage of pictures of sliced turkey breast, cranberry mocktail, latte, and stuffing with overlay text that reads "Simply Tasteful Holiday Edition by Lisa Coop."

    Need more gluten free breakfast options? Check these recipes out:

    • Gluten Free Pumpkin Muffins
    • Double Chocolate Chip Banana Muffins
    • Toasted Coconut Mocha Overnight Oats

    Dairy Free Breakfast Casserole

    This overnight, dairy free breakfast casserole makes breakfast a breeze! Just pop this pre-made dish in the oven, and bake while you carry on. This breakfast casserole is perfect for holiday mornings, or when you have guests in town!
    Print Pin
    Course: Breakfast
    Cuisine: American
    Keyword: breakfast casserole, dairy free, gluten free, overnight breakfast
    Prep Time: 10 minutes
    Cook Time: 1 hour
    Servings: 12
    Calories: 170kcal

    Ingredients

    • 1 pound ground turkey sausage
    • 1/2 onion, chopped
    • 1 teaspoon avocado oil
    • 8 eggs
    • 1 package shredded hashbrowns
    • 1/2 cup shredded cheddar, divided Use dairy-free cheddar if avoiding dairy
    • 1/2 cup unsweetened coconut milk
    • 1 teaspoon kosher salt
    • 1/2 teaspoon pepper

    Instructions

    • Heat avocado oil over medium heat.
      1 teaspoon avocado oil
    • Add onions to pan and cook until translucent, 5-8 minutes.
      1/2 onion, chopped
    • Add turkey sausage to pan and cook until browned.
      1 pound ground turkey sausage
    • In a large bowl, combine cooked sausage and onion mixture with the eggs, hashbrowns, 1⁄4 cup shredded cheddar, salt, pepper, and coconut milk.
      8 eggs, 1 package shredded hashbrowns, 1/2 cup shredded cheddar, divided, 1 teaspoon kosher salt, 1/2 teaspoon pepper, 1/2 cup unsweetened coconut milk
    • Mix ingredients well and then transfer to large baking dish. Top with remaining shredded cheese.
    • Cover with foil and refrigerate overnight.
    • When you are ready to cook the breakfast casserole, preheat oven to 350°
    • Bake covered with foil for 1 hour to 1 hour, 15 minutes until toothpick comes out clean.
    • Let cool for 5-10 minutes before cutting. Serve and enjoy!

    Notes

    To easily track the macros for this dish, search MFP for "Lisa Coop Overnight Breakfast Hashbrown Casserole".

    Nutrition

    Serving: 1cup/square | Calories: 170kcal | Carbohydrates: 10g | Protein: 11g | Fat: 9g | Fiber: 1g

    If you try out this breakfast casserole, be sure to tag me on Instagram so I can see you enjoying it! And if you try it and love it, a 5 star rating and review below would mean the world to me!

    Air Fryer Sausage and Veggies

    Dec 11, 2021 ·

    This 8 minute air fryer sausage and veggies recipe is a super simple and quick meal! This is the perfect macro friendly lunch or dinner that is easy, full of flavor, and requires hardly any clean up!

    white bowl filled with chicken sausage and roasted vegetable medley over white rice

    What Ingredients You Need to Make Air Fryer Chicken Sausage & Veggies

    Ingredients

    • Chicken sausage links
    • Onion
    • Broccoli
    • Zucchini
    • Red bell pepper
    • Avocado oil
    • Minced garlic
    • Italian seasoning
    • Garlic powder
    • Smoked paprika
    • Kosher salt

    How to prep this air fryer meal

    This simple recipe requires very little prep, time and equipment. All you need is a cutting board, knife, large mixing bowl, and an air fryer. Step one is to chopped your sausage and veggies.

    Slice the chicken sausage into 1/4 inch pieces. Next, slice the zucchini, onion, dice your red bell pepper, and chop up your broccoli florets. You could also used pre-chopped peppers, onions, zucchini and frozen broccoli to make this meal even faster.

    Now, place the chicken sausage and veggies into a large mixing bowl. Pour the oil into the bowl with sausage, and veggies, and sprinkle with the seasonings. Stir all ingredients together, being sure to coat the sausage and veggies thoroughly.

    How to Cook Air Fryer Sausage and Veggies

    Preheat air fryer to 350 degrees. Place in air fryer for 8 to 10 minutes or until veggies reach desired tenderness. That's it! Easy peasy!

    How to serve this meal

    This air fryer sausage and veggie recipe can work perfectly for either a low card day, or a higher carb (regular macro) day! For a low carb day, serve over cauliflower rice, mashed cauliflower, or just alone! To enjoy this meal on a higher carb day, pair with brown or white rice, quinoa, or over chickpea pasta. So easy, and so versatile!

    white bowl filled with chicken sausage and roasted vegetable medley over white rice with air fryer containing sausage and veggie mixture

    Looking for some other simple air fryer recipes? Check these out!

    Air Fryer Citrus Chicken Tenders

    Avocado Chicken Burgers

    Air Fryer Potato Wedges

    If you try out this air fryer sausage and veggie recipe, be sure to tag me on Instagram so I can see your meal! And if you try and love it, a 5 star rating and review below would mean the world to me!

    Air Fryer Sausage and Veggies

    This 8 minute air fryer sausage and veggies recipe is a super simple and quick meal! This is the perfect macro friendly lunch or dinner that is easy, full of flavor, and requires hardly any clean up!
    Print Pin
    Course: Main Course
    Cuisine: American, Mediterranean
    Keyword: air fryer, gluten free, One pan, quick
    Prep Time: 8 minutes
    Cook Time: 8 minutes
    Servings: 5
    Calories: 172kcal
    Author: Lisa

    Equipment

    • air fryer
    • Cutting board
    • Knife
    • Large mixing bowl

    Ingredients

    • 4 links chicken sausage sliced into 1/4 inch pieces
    • 2 zuccinni halved and sliced
    • 1/2 onion chopped in large chunks
    • 1 cup broccoli florets fresh or frozen
    • 1 red bell pepper chopped
    • 2 tablespoons avocado oil
    • 2 teaspoons minced garlic
    • 1 tablespoon Italian seasoning
    • 1/2 teaspoon garlic powder
    • 1/2 teaspoon smoked paprika
    • 1/2 teaspoon kosher salt

    Instructions

    • Preheat air fryer to 350°.
    • Slice and chop sausages, zucchini, onions, broccoli and bell pepper.
      4 links chicken sausage, 2 zuccinni, 1/2 onion, 1 cup broccoli florets, 1 red bell pepper
    • Place sausage and veggies in a large mixing bowl
    • Pour oil and spices in mixing bowl with sausage and veggies. Stir to coat the sausage and veggies well.
      1 red bell pepper, 2 tablespoons avocado oil, 2 teaspoons minced garlic, 1 tablespoon Italian seasoning, 1/2 teaspoon garlic powder, 1/2 teaspoon smoked paprika, 1/2 teaspoon kosher salt
    • Pour all ingredients into air fryer.
    • Cook in air fryer at 350° for 8-10 minutes, depending on desired tenderness of veggies.
    • Serve over cauliflower rice, rice, mashed cauliflower, or pasta.

    Notes

    To easily track this recipe in your macros, search the My Fitness Pal app for "Lisa Coop Air Fryer Sausage and Veggies."

    Nutrition

    Serving: 1cup | Calories: 172kcal | Carbohydrates: 5g | Protein: 11g | Fat: 11g | Fiber: 2g

    Sweet and Spicy Chinese Chicken

    Dec 7, 2021 ·

    This sweet and spicy Chinese chicken is a 15 minute meal, and is one of my favorites to make for lunches. It mimics the flavors and comfort of Chinese take-out, without all the calories and extra cost.

    An easy and affordable way to increase your protein is to cook meals with ground meat. This easy chicken recipe uses ground chicken to create a comfort food staple, but is also easy on the macro budget. Ground chicken is quick and easy to make, and can be used in so many ways.

    What Ingredients You Need to Make This Chicken

    • Ground chicken
    • Sesame oil
    • Honey
    • Buffalo sauce
    • Rice vinegar
    • Garlic powder
    • Kosher salt
    • Pepper
    • Crushed red pepper

    How to make Sweet and Spicy Chinese Chicken

    There is really nothing to this recipe. All you will need to do is first brown your chicken in the sesame oil. While the chicken is cooking, combine the remaining ingredients to make the sauce.

    Whisk the sauce ingredients until well combined, and pour over cooked chicken in pan. Simmer 2-3 minutes until sauce thickens.

    How to eat your Sweet and Spicy Chinese Chicken

    This recipe is easy to manipulate into different meals. It works well for a low carb meal or a higher carb meal, your choice! Because I carb cycle I love to use it for both! My favorite ways to eat this for a low carb day is to make lettuce wraps. For higher carb day, I enjoy it over rice and broccoli. Just like takeout in a bowl, but healthier!

    Meal Ideas For This Recipe

    • Lettuce wraps (low carb)
    • Eat with cauliflower rice (low carb)
    • Toss with broccoli (low carb)
    • Make a bowl with rice and broccoli or sugar snap peas
    • Over lo mein noodles and broccoli
    • Wrap in rice paper for spring rolls

    Looking for some other simple, macro-friendly recipes? Check these out!

    Air Fryer Citrus Chicken Tenders

    Taco Stuffed Zucchini Boats

    Avocado Chicken Burgers

    If you try out this sweet and spicy chicken, be sure to tag me on Instagram so I can see your meal! And if you try them and love them, a 5 star rating and review below would mean the world to me!

    Sweet and Spicy Chinese Chicken

    This sweet and spicy Chinese chicken is a 15 minute meal that is one of my favorites to make for lunches. It mimics the flavors and comfort of Chinese take-out, without all the calories and extra cost.
    Print Pin
    Course: Appetizer, Main Course
    Cuisine: Chinese
    Keyword: chicken, chinese, Easy dinner, quick, spicy, sweet and spicy
    Prep Time: 5 minutes
    Cook Time: 10 minutes
    Servings: 6
    Calories: 299kcal
    Author: Lisa

    Equipment

    • Stove top
    • Large skillet
    • Large mixing bowl
    • Whisk

    Ingredients

    • 2 pounds ground chicken
    • 1 tablespoon sesame oil
    • 1/4 cup honey
    • 1/4 cup buffalo sauce
    • 3 tablespoons rice vinegar
    • 2 teaspoons garlic powder
    • 1/2 teaspoon kosher salt
    • 1/2 teaspoon pepper
    • 1/2 teaspoon crushed red pepper

    Instructions

    • Heat sesame oil in skillet over medium heat.
      1 tablespoon sesame oil
    • Add chicken to skillet with oil.
      2 pounds ground chicken
    • Combine remaining ingredients in large mixing bowl to make sauce, while chicken is cooking.
      1/4 cup honey, 1/4 cup buffalo sauce, 3 tablespoons rice vinegar, 2 teaspoons garlic powder, 1/2 teaspoon kosher salt, 1/2 teaspoon pepper, 1/2 teaspoon crushed red pepper
    • When chicken is cooked, add sauce mixture to pan with chicken.
    • Simmer sauce and chicken together over low heat for 2-3 minutes until sauce thickens.
    • Serve over rice, cauliflower rice, in lettuce wraps, or with lo mein. Enjoy!

    Notes

    To easily track this recipe in your macros, search the My Fitness Pal app for "Lisa Coop Sweet & Spicy Chinese Chicken."

    Nutrition

    Serving: 115g | Calories: 299kcal | Carbohydrates: 15g | Protein: 27g | Fat: 15g

    How To Stay Healthy During the Holidays

    Nov 24, 2021 ·

    Staying healthy during the holidays does not mean misery and deprivation. Keep reading for 5 simple tips to implement to avoid the dreaded holiday weight gain.

    Don't wait for January 1 - progress can be made right now with a few small changes. Are you in a holding pattern? Putting everything off until there's a better time? Or wait, maybe you think January 1! That's it!

    What's so magical about January 1? It's a Saturday. It's not even a Monday. And you know what you think about Mondays….how many times have you said to yourself, “I'll start on Monday."

    But the truth is….if you do the math, there are around 100 “normal meals” and about 12 “holiday meals over the next 37 days.

    Do yourself a favor and don't label this last quarter of the year as “just the holidays”.  You can do things differently this year! 

    Picture it now, you wake up on the morning of January 1 slip into your favorite workout leggings and immediately get ready to get your sweat on. It's part of who you are now. You've learned over the past few months that when you treat your body well, you feel amazing. You reach over and pick up the heavier set of dumbbells your hubby got you for Christmas, and you can't wait to use them today. You are at ease, you remember you have a few yummy macro-friendly meals ready to pop into the oven for later. You can't wait to enjoy a little football with your family. It's incredible to feel in control of your food choices and feel so confident in your own skin. You smile and think to yourself how smart you were. You started to take care of yourself way back in November instead of waiting until January 1. You can't wait to see even more changes as you approach spring break!! Now this is a picture you'd like to see, isn't it?

    And you can, if you start today! 

    Here are my 5 best tips for staying healthy during the holidays

  • Get realistic about your calendar. Seriously, look at the next two months and see how many parties, get-togethers, and travel you ACTUALLY have. You might be surprised it’s not as many meals to worry about.
    • Keep your normal routine when you can. Now that you’ve gotten clear on your calendar. You can maintain your typical food plan and workout schedule on non-holiday days. If you stay consistent on the non-holiday days, you’ll still make progress. 
    • Make simple swaps! You might be surprised by some of the yummy macro-friendly recipes you can make in place of the typical not-so-great for you holiday dishes. And honestly, roast up a pan full of amazing veggies - super delish and filling! Need some ideas, grab some of my favorite simple holiday recipes here.
    • Drink water! Don’t forget to hydrate. You do so many good things for you when make drinking water a priority. And if you decide to include a few more indulgences this holiday season, water is helpful in fighting off exhaustion and can help control cravings.
    • Memories over macros! On the holidays, ENJOY your favorites. Having a healthy mindset around food and treats is the best thing you can do for your health long-term. Remind yourself there are no “bad foods” and that you are NOT being “bad” by having grandma’s pecan pie, after all, she made it with love, just for you. You can have a piece and enjoy it, knowing you’ll be back to your normal eating habits the following day.

    Make an effort NOW. Don't wait.

    I encourage you to take the steps NOW to begin your health journey. There’s no need to wait until January 1. You can make a few small changes to your food choices and exercise routine and you can begin looking and feeling your best right now! 

    Cheering you on!

    P.S. If you are ready to get control of your health and wellness, but need guidance and support, I am here to help. Click here to learn more about working with me as your coach.

    Gingerbread Protein Balls

    Nov 11, 2021 ·

    These chocolate gingerbread protein balls are a festive snack that is perfect to take on the go! These protein balls are super easy to make with simple ingredients you most likely already have in your pantry!

    With the holidays just around the corner, I wanted to create a quick holiday recipe that is portable and macro friendly. These easy protein balls are perfect to throw in your purse or the kids' lunchboxes for a great snack packed with protein, and healthy carbs and fats. The balanced macros in these small bites will provide you with the energy you need without all the sugars of processed protein bars. Best part is, I threw these together in only 10 minutes with ingredients that are always in my pantry!

    Gingerbread Protein Bites Ingredients

    • Chocolate protein powder
    • Oats
    • Almond butter
    • Honey
    • Unsweetened almond milk
    • Vanilla
    • Cinnamon
    • Ginger
    • Nutmeg
    • Salt

    How to make these gingerbread protein balls

    Another perk to these protein balls is it only takes one bowl! All you need to do to make these is combine all your ingredients together in a large mixing bowl, and mix well. You can stir these by hand to mix, but if you have an electric mixer, I recommend using that. I used my standing mixer, and it worked beautifully.

    After the ingredients are mixed well, use your hands to form balls about one inch in diameter. I used a tablespoon to scoop the mixture for each ball to keep them uniform in size (this is important for accurate macros.) Place the formed balls on a cookie sheet lined with wax paper. Refrigerate the protein bites for at least one hour.

    When using a tablespoon, you should have 15 protein balls.

    What type of protein powder should I use?

    I use my FASTer Way chocolate grass-fed beef protein, and it is delicious! However, you can use any protein powder you prefer, but just know that macros will vary depending on the nutrition facts of the particular brand that you choose to use.

    Want more macro-friendly holiday recipes!?

    Grab my holiday favorites recipe guide below!

    GET YOUR FREE HOLIDAY RECIPE GUIDE HERE

    GRAB YOUR FREE HOLIDAY RECIPES HERE

    Print
    clock clock iconcutlery cutlery iconflag flag iconfolder folder iconinstagram instagram iconpinterest pinterest iconfacebook facebook iconprint print iconsquares squares iconheart heart iconheart solid heart solid icon

    Gingerbread Protein Balls


    • Author: Lisa
    • Total Time: 10 minutes
    • Yield: 15 bites 1x
    • Diet: Gluten Free
    Print Recipe
    Pin Recipe

    Description

    These chocolate gingerbread protein balls are a festive snack that is perfect to take on the go! These balls are super easy to make with simple ingredients you most likely already have in your pantry!


    Ingredients

    Scale

    1 cup quick oats (80g)

    2 scoops chocolate protein powder (50g)

    4 tablespoons unsweetened almond butter

    2 tablespoons honey

    2 tablespoons unsweetened almond milk

    1 teaspoon vanilla

    1/2 teaspoon cinnamon

    1/4 teaspoon ground ginger

    1/4 teaspoon nutmeg

    1/4 tsp kosher salt


    Instructions

    1. Line baking sheet with wax paper.
    2. Combine all ingredients in a large mixing bowl.
    3. Mix all ingredients with mixer until well combined.
    4. Using a tablespoon, scoop out mixture one tablespoon at a time, and form into balls about one inch in diameter.
    5. Place formed balls on baking sheet, and refrigerate for at least one hour, then enjoy!

    Notes

    To easily track these macros, search the My Fitness Pal app for "Lisa Coop Gingerbread Protein Bites."

    • Prep Time: 10 minutes
    • Cook Time: 0 minutes
    • Category: Snack
    • Method: No cook

    Nutrition

    • Serving Size: 3 protein bites
    • Calories: 200
    • Fat: 8
    • Carbohydrates: 21
    • Fiber: 3
    • Protein: 13

    Keywords: protein, protein balls, protein bites, snack

    Did you make this recipe?

    Share a photo and tag us — we can't wait to see what you've made!

    Want more macro friendly treats!?

    Check out these recipes!

    • Chocolate Chip Banana Muffins
    • Gluten-Free Pumpkin Muffins
    • Healthy Pumpkin Blondies

    How To Burn Fat Without Cardio

    Nov 9, 2021 ·

    woman standing outside holding a pair of dumbbells

    If you are ready to hear how you can more effectively burn fat with little to no cardio, keep reading.

    The old ways weren't working anymore.

    Cardio. Eat Less. Exercise More. 

    This is what I thought it took to look and feel better.  

    So many clients come to me after their “old tricks” stop working for them. You know, in college you could decide to eat a few less fat-free gummy bears and skip your diet coke for a few days and you'd be feeling less fluffy. (I can't believe I thought gummy bears were a diet food!)  

    But now, after the college days, after kids...things are a little more challenging. It seems no matter what you do your jeans are snug! It's frustrating because think you are eating healthy!!  

    This is why I broke up with the treadmill and picked up some weights.  

    Incorporating strength training might just be what you are missing to slip back into your favorite white jeans with ease.  

    How it's possible to burn fat with minimal cardio


    Ok, hang with me. There are a couple of things you need to know. In your 30's, physically inactive people can lose as much as 3% to 5% off their muscle mass! And even active people will have some muscle lost.  

    And this one…about 70% of your daily calorie burn is your Basel Metabolic Rate. This is what your body burns by just staying alive.  

    And this is important…Only 5% of your daily calorie burn comes from exercise activity! WHAT?!?

    Daily calorie burn pie chart

    What does strength training do for you?

    Ok, what does this mean. Well it's kind of exciting, you can increase your BMR if you increase your muscle mass. Yes, strength training is one of the most effective ways to rev up your metabolism and get you burning more calories! Plus there's science to show that your metabolism stays elevated after your strength training sessions – sometimes up to 38 hours after!!  

    Throw in some leveled-up nutrition with a focus on protein and you've got the secret to feeling leaner and stronger! Think simple! Try one of my simple proteins, the avocado chicken burger!

    Do you think there is evidence to put strength training to the top of your to-do list? Comment below.

    Air Fryer Potato Wedges

    Nov 3, 2021 ·

    These crispy, flavorful air fryer potato wedges are a quick way to add healthy comfort as a side dish to your favorite easy weeknight meal. Pair these with your favorite burger or top with chili for a fun Friday night dinner.

    potato wedges on a white plate with ketchup in a small bowl

    Potato Wedges made in the Air Fryer are crispy on the outside and tender and soft on the inside – just like your favorite fried wedges. Making wedges in the Air Fryer saves you calories compared to traditional deep frying but also makes them a lot crispier than baking in the oven.

    What you will need:

    The ingredients needed for this tasty side dish are basic items that you probably already have in your pantry!

    • 2 russet potatoes
    • Avocado oil (could also use EVOO)
    • Kosher salt
    • Paprika
    • Garlic Powder
    • Black Pepper

    Which potato is best?

    Russet potatoes work best for wedges. They cook faster and crisp up better than other potatoes. Potatoes are on the dirty dozen list for high levels of pesticide residue, so if you can swing organic, that is best. Also, it's important to keep the wedges in a single layer, if you pile them on top of each other they’ll steam, and they won’t have that crispy brown skin like we want.

    How to cut into wedges:

    Cutting potato wedges is so much easier than cutting fries. Cut a potato in half. Halve potato, then halve EACH HALF again, so you have 4 pieces. That's it!

    What to pair with potato wedges:

    These crispy snacks are great alone with your favorite dipping sauce (I love plain ketchup!), but below are some of my favorite ways to enjoy them!

    • Add to my loaded burger bowl
    • Topped with chili
    • Paired with my favorite burger
    • Paired with buffalo turkey meatballs

    Print
    clock clock iconcutlery cutlery iconflag flag iconfolder folder iconinstagram instagram iconpinterest pinterest iconfacebook facebook iconprint print iconsquares squares iconheart heart iconheart solid heart solid icon

    Air Fryer Potato Wedges


    • Author: Lisa
    • Total Time: 22 minutes
    • Yield: Makes 2 servings 1x
    • Diet: Gluten Free
    Print Recipe
    Pin Recipe

    Description

    These crispy, flavorful potato wedges are a quick way to add healthy comfort as a side dish to your favorite easy weeknight meal.


    Ingredients

    Scale

    2 russet potatoes, cut into wedges

    1 tablespoon avocado oil

    1 teaspoon kosher salt

    1/2 teaspoon paprika

    1/2 teaspoon garlic powder

    1/2 teaspoon black pepper


    Instructions

    1. Preheat air fryer to 400°.
    2. Place potato wedges in large bowl.
    3. Pour oil over potato wedges in bowl, and sprinkle spices over potato wedges.
    4. Toss potato wedges in oil and spices until well coated.
    5. Air fry for 12-15 minutes, depending on your desired crispiness.

    Notes

    To easily track these macros in the My Fitness Pal app, search for "Lisa Coop Air Fryer Potato Wedges."

    • Prep Time: 7 minutes
    • Cook Time: 15 minutes
    • Category: Dinner
    • Method: Air fryer
    • Cuisine: American

    Nutrition

    • Serving Size: 6 oz (173g)
    • Calories: 178
    • Fat: 7
    • Carbohydrates: 27
    • Fiber: 2
    • Protein: 3

    Keywords: Air Fryer, Potato, Potatoes, Gluten Free, Side Dish

    Did you make this recipe?

    Share a photo and tag us — we can't wait to see what you've made!

    Looking for an EASY, macro-friendly main course to pair with these air fryer potato wedges? Check out these simple recipes below!

    • Avocado Chicken Burgers
    • Air Fryer Citrus Chicken Tenders

    Chicken Alfredo Spaghetti Squash

    Oct 26, 2021 ·

    This amazingly easy, SEVEN ingredient chicken alfredo spaghetti squash dinner makes the perfect healthy, comfort dinner option for those busy weeknights. The sweet roasted flavor of the spaghetti squash combined with the tangy alfredo flavor hits the spots. It is truly a bowl full of comfort, but it's healthy and macro friendly!

    Chicken Alfredo Spaghetti Squash Ingredients

    This is is a short list! All you need is 7 ingredients! #winning, and then you are on your way to a delicious bowl of healthy comfort food for dinner.

    • 1 pound chicken breast, shredded
    • 1 spaghetti, roasted
    • 1 jar (15 oz) alfredo sauce ( I use Rao's)
    • 1 cup broccoli florets, cooked
    • 3 oz mozzarella cheese, shredded
    • 1 tablespoon avocado oil
    • 1 teaspoon salt

    Watch Me Make It

    Step One

    The first step is to get your spaghetti squash roasted. Begin by preheating your oven to 425°. Next, carefully cut your spaghetti in half, lengthwise, and scoop out the seeds. Drizzle avocado oil over the inside on the squash, and season with salt and pepper. Turn the squash upside down, pierce the skin with a fork 5-7 times, and then bake in the preheated oven for 40 minutes.

    Step Two

    While the squash is baking, this is when I steam my broccoli. I usually steam it in the microwave because #easy. After the squash is finished baking, allow to cool for 5-10 minutes, and then use a fork to scrape out the squash "noodles." Spray am 8x11 inch baking dish with cooking spray, then place the squash in the dish.

    Step Three

    Lastly, combine the squash, shredded chicken, alfredo sauce, salt and broccoli in the baking dish. Stir to combine well. Top with shredded cheese, then bake at 350° for 8-10 minutes until cheese is melted and edges are bubbly.

    Baked spaghetti squash with melted cheese on top in white baking dish

    Tips For Making Chicken Alfredo Spaghetti Squash

    • Use rotisserie chicken for those super busy nights
    • Cook & shred your chicken on the weekend while meal prepping so it's ready to toss in during the week!
    • Feel free to replace the broccoli with chopped spinach

    Looking for more EASY, low carb weeknight dinners!? Check out these below!

    • Avocado Chicken Burgers
    • Coconut Lime Chicken
    • Taco Stuffed Zucchini Boats
    • Air Fryer Citrus Chicken Tenders

    Print
    clock clock iconcutlery cutlery iconflag flag iconfolder folder iconinstagram instagram iconpinterest pinterest iconfacebook facebook iconprint print iconsquares squares iconheart heart iconheart solid heart solid icon

    Chicken Alfredo Spaghetti Squash


    • Author: Lisa
    • Total Time: 52 minute
    • Yield: Makes 7 servings 1x
    • Diet: Gluten Free
    Print Recipe
    Pin Recipe

    Description

    This amazingly easy, 7-ingredient chicken alfredo spaghetti squash dinner makes the perfect healthy, comfort dinner option for those busy weeknights. The sweet roasted flavor of the spaghetti squash combined with the tangy alfredo flavor hits the spots. It's truly a bowl full of comfort, but it's healthy and macro friendly!


    Ingredients

    Scale

    3 cups chicken breast, shredded (400 g cooked)

    1 spaghetti squash (400g cooked)

    1 cup broccoli florets

    1 (15 0z) jar alfredo sauce

    3 oz mozzarella cheese, shredded

    1 tablespoon avocado oil

    1 teaspoon kosher salt


    Instructions

    1. Preheat oven to 425°.
    2. Cut spaghetti squash in half, lengthwise
    3. Scoop out seeds from squash, then drizzle with avocado oil, and season with salt and pepper.
    4. Turn squash upside down in baking dish, pierce the skin with fork 5-7 times on each half.
    5. Bake spaghetti squash in over for 40 minutes.
    6. While squash is cooking, steam broccoli and shred chicken if not already done.
    7. After spaghetti squash is cooked, allow to cool for 5-10 minutes, then shred the squash with the fork.
    8. Place cooked squash "noodles" in greased 8x11 inch baking dish.
    9. Add chicken, broccoli, alfredo sauce, and salt to baking dish with squash and stir to combine well.
    10. Sprinkle shredded mozzarella on the combined ingredients, then bake at 350° for 8-10 minutes until cheese is melted and edges are lightly browned and bubbly.

    Notes

    To easily track these macros in My Fitness Pal, search for "Lisa Coop Chicken Alfredo Spaghetti Squash."

    • Prep Time: 10 mintes
    • Cook Time: 50 minutes
    • Category: Dinner
    • Method: Oven
    • Cuisine: Italian

    Nutrition

    • Serving Size: 1 cup (180g)
    • Calories: 226
    • Fat: 13
    • Carbohydrates: 8
    • Fiber: 1
    • Protein: 22

    Did you make this recipe?

    Share a photo and tag us — we can't wait to see what you've made!

    When you give this chicken alfredo spaghetti squash a try, leave me a comment below, rate them, and don’t forget to tag me on Instagram @lisa.m.coop! I would love to see you enjoying them!

    Healthy Pumpkin Blondies

    Oct 15, 2021 ·

    These deliciously gooey, healthy pumpkin blondies are the perfect fall treat that you don't have to feel guilty about! The almond butter, pumpkin, and bananas combine perfectly together for a sweet treat without added sugars. These are a huge hit in our house, and a treat I don't feel bad about serving up!

    pumpkin blondie brownies with chocolate chips on top on white plate with bowl of melted chocolate beside the plate

    Healthy Pumpkin Blondie Ingredients

    These pumpkin blondies were so easy to whip up, and this will certainly be on repeat here this fall. These are the ingredients you want to grab from the store on your next trip so you can treat yourself to these blondies soon!

    • Bananas
    • Unsweetened Applesauce
    • Pumpkin puree
    • Almond butter
    • Eggs
    • Vanilla
    • Almond flour
    • Tapioca flour
    • Cinnamon
    • Baking Powder
    • Mini Chocolate Chips - I love these dairy-free chocolate chips
    • Salt

    Let's Make Our Blondies

    First up, combine all the wet ingredients and mix well. Then combine your dry ingredients together, and give them a good stir. Next, combine your mixed dry ingredients with your wet ingredients, and mix until combined. Lastly, stir in your chocolate chips, pour batter into greased baking dish, and bake. After your healthy pumpkin blondies cool, drizzle with melted chocolate chips, and almond butter to really take these treat up a notch. Trust me, you won't regret it.

    white pan with healthy pumpkin blondies with drizzled chocolate and almond butter on top

    Tips For Making These Blondies

    • Be sure to grease your pan well, or line with parchment paper
    • Do not over-mix your batter
    • Let them completely cool before cutting.

    How To store Your Healthy Pumpkin Blondies

    You can store the blondies at room temperature for up to 3 days. After that, it is best to refrigerate them. You can store them in the fridge for up to 5 days, but good luck on them lasting that long! They didn't last a full 24 hours in our house!

    pumpkin blondies drizzles with melted chocolate and almond butter topped with chocolate chips on white plate beside a white pan of pumpkin blondies

    Want More Healthy Sweet Treat Recipes?

    • Gluten Free Pumpkin Muffins
    • Toasted Coconut Mocha Overnight Oats
    • Banana Chocolate Chip Muffins
    Print
    clock clock iconcutlery cutlery iconflag flag iconfolder folder iconinstagram instagram iconpinterest pinterest iconfacebook facebook iconprint print iconsquares squares iconheart heart iconheart solid heart solid icon

    Healthy Pumpkin Blondies


    • Author: Lisa
    • Total Time: 40 minutes
    • Yield: Makes 12 1x
    • Diet: Gluten Free
    Print Recipe
    Pin Recipe

    Description

    These deliciously gooey, healthy pumpkin blondies are the perfect fall treat that you don't have to feel guilty about! The almond butter, pumpkin, and bananas combine perfectly together for a sweet treat without added sugars. These are a huge hit in our house, and a treat I don't feel bad about serving up!


    Ingredients

    Scale

    2 bananas, mashed

    1/4 cup unsweetened applesauce

    1/4 cup pumpkin puree

    1/4 cup almond butter

    2 eggs

    1 teaspoon vanilla

    1 cup almond flour

    1/3 cup tapioca flour

    1 teaspoon cinnamon

    1 teaspoon baking powder

    1 teaspoon salt

    1/3 cup mini dark chocolate chips


    Instructions

    1. Preheat the oven to 350°.
    2. Grease 8x8 inch baking dish.
    3. Combine mashed bananas, applesauce, pumpkin, almond butter, eggs and vanilla in large mixing bowl and mix well.
    4. Combine almond flour, tapioca flour, cinnamon, baking powder, and salt in medium bowl and stir.
    5. Carefully mix the flour mixture with pumpkin mixture and mix together until combined.
    6. Fold in chocolate chips.
    7. Pour batter into baking dish and bake at 350° for 30 minutes. Check for doneness by inserting a toothpick in the blondies, and ensuring the toothpick comes out clean. 
    8. Let cool completely before cutting. 

    Notes

    To easily track these macros in My Fitness Pal, search for “Lisa Coop Healthy Pumpkin Blondies.”

    • Prep Time: 10 minutes
    • Cook Time: 30 minutes
    • Category: Dessert, Breakfast
    • Method: Oven
    • Cuisine: American

    Nutrition

    • Serving Size: 1/12 of pan (square)
    • Calories: 113
    • Fat: 7
    • Carbohydrates: 12
    • Fiber: 2
    • Protein: 3

    Keywords: Gluten Free, Pumpkin, Dessert

    Did you make this recipe?

    Share a photo and tag us — we can't wait to see what you've made!

    When you give these pumpkin blondies a try, leave me a comment below, rate them, and don’t forget to tag me on Instagram @lisa.m.coop! I would love to see you enjoying them!

    Avocado Chicken Burger

    Oct 8, 2021 ·

    White plate with avocado chicken burger patty with sliced avocado and slaw on top of patty with slice of lime on plate

    These simple avocado chicken burgers are bursting with flavor. The avocado keeps the burger deliciously juicy, and quite frankly takes the burger to a whole new level! So, even if you aren't an avocado lover, I suggest still giving these burgers a shot!

    What you will need for your juicy Avocado Chicken Burger

    One reason I love this recipe is because we use the most simple ingredients to produce a burger that is full of flavor! Nothing makes me more happy than simple! Most of these ingredients you will likely already have on hand or is something you purchase frequently on your weekly trips to the grocery. Here is all you need to make these burgers:

    • Ground chicken
    • Two mini avocados
    • Cilantro
    • Garlic powder
    • Limes
    • Onion Powder
    • Spinach
    • Milled flaxseed
    • Salt

    How to make your Burger

    This is the BEST part! You literally just dump everything into the bowl and mix together. THAT'S IT!

    Give the ingredients a good stir to mix everything well, and then form your patties. Since I track macros, I keep my kitchen scale handy and weigh each patty as a make it, but if you aren't tracking macros, then no need to worry about that!

    White plate with avocado chicken burger patty with sliced avocado and slaw on top of patty with slice of lime on plate

    How to cook your Avocado Chicken Burger

    I used my air fryer to makes these avocado chicken burgers, but you can certainly grill them (which would definitely be more time effective when making this many), pan fry them, or even pop them in the oven! I cooked mine in the air fryer for 10 minutes at 350 degrees, turning halfway through. BOOM! No babysitting those burgers, and easy clean-up!

    White plate with avocado chicken burger patty with sliced avocado and slaw on top of patty with slice of lime on plate

    What to eat with your chicken burger:

    I love to top these these burgers with slaw and sliced avocado and pair with sweet potato fries OR my favorite roasted veggie combo. You could also top a fresh, delicious salad with these burger patties for a healthy, protein-packed meal! That is one thing I love about any burgers, they are SO versatile!

    Print
    clock clock iconcutlery cutlery iconflag flag iconfolder folder iconinstagram instagram iconpinterest pinterest iconfacebook facebook iconprint print iconsquares squares iconheart heart iconheart solid heart solid icon

    Avocado Chicken Burger


    • Author: Lisa
    • Total Time: 20 minutes
    • Yield: Makes 10 patties 1x
    • Diet: Gluten Free
    Print Recipe
    Pin Recipe

    Description

    These simple avocado chicken burgers are bursting with flavor. The avocado keeps the burger deliciously juicy, and quite frankly takes the burger to a whole new level!


    Ingredients

    Scale

    2 pounds ground chicken

    2 mini avocados, cubed

    2 limes, juiced

    1/2 cup chopped spinach

    2 tablespoons chopped cilantro

    2 tablespoons milled flaxseed

    1 tablespoon garlic powder

    1 tablespoon onion powder

    1 teaspoon kosher salt


    Instructions

    1. Preheat air fryer to 350 degrees. You can certainly grill these burgers or broil in the oven, but I used my air fryer. 
    2. Combine ground chicken, cubed avocado, lime juice, spinach, cilantro, flaxseed, garlic powder, onion powder, and salt in a large bowl.
    3. Stir all ingredients together to mix well.
    4. Form into 10 patties (4 oz each) and then add to preheated air fryer cooking for 8-10 minutes, flipping the patties half way through. 
    5. Remove from air fryer and serve on a bun or in a bowl of choice.
    6. Finally serve with anything you’d like! I enjoy mine without a bun with roasted veggies or sweet potato fries. Enjoy!

    Notes

    Easily track these macros by searching My Fitness Pal for "Lisa Coop Spinach Avocado Chicken Burger"

    • Prep Time: 10 minutes
    • Cook Time: 10 minutes
    • Category: Dinner
    • Method: Air fryer
    • Cuisine: American

    Nutrition

    • Serving Size: 4 oz patty
    • Calories: 157
    • Fat: 9
    • Carbohydrates: 4
    • Fiber: 2
    • Protein: 17

    Keywords: Avocado Chicken burger

    Did you make this recipe?

    Share a photo and tag us — we can't wait to see what you've made!

    When you give these burgers a try, leave me a comment below, rate them, and don’t forget to tag me on Instagram @lisa.m.coop! I would love to see you enjoying them!

    Gluten-Free Pumpkin Muffins

    Sep 22, 2021 ·

    These Gluten-Free Pumpkin Muffins will be a regular in our home this fall! I am always looking to create quick and healthy breakfast options for my girls. You know, ones they will actually eat. And now that fall and all things pumpkin are here, I thought what's better than a pumpkin muffin! My recent challenge to eliminate added sugars inspired me to create these muffins only sweetened with banana. I had no idea how they would turn out, but they are a BIG hit here in our house. In fact, they were gone within 24 hours!

    What You Will Need

    If you have been around here any amount of time, you know that I live for creating SIMPLE recipes using minimal ingredients. This recipe is no different. With only 9 ingredients, these no sugar gluten free pumpkin muffins turned out beautifully, and all but one ingredient was already in my pantry. Score! The only thing I didn't have on hand was the almond flour, but that was a quick grab from the grocery. I use this almond flour, and I really like it. If you don't mind adding a little sugar, you could also throw in 1/4 to 1/3 cup of dairy free mini chocolate chips for a little treat : )

    Gluten-Free Pumpkin Muffin Making Action

    Start by preheating your oven to 350 degrees. Then combine the mashed bananas, almond butter, pumpkin, egg, and vanilla in a large mixing bowl. Mix those ingredients well. Next combine your almond flour, baking soda, salt and cinnamon into a medium bowl. Stir to mix those dry ingredients.

    Add all wet ingredients to large mixing bowl
    Add all dry ingredients to medium bowl

    Next, slowly add the dry ingredient mixture to the wet ingredients, and mix or still until well combined. Pour in greased muffin pan or line muffin pan with muffin liners. I topped mine with a few oats.

    Pour batter into lined muffin pan
    I sprinkled a little oats on top because I am extra

    Lastly, pop these babies into the preheated oven, and bake at 350 degrees for 18-22 minutes until done. Allow to cool completely. I drizzled mine with a little almond butter before serving, and they were AMAZING!! Hope you enjoy! If you need other delicious, quick, and good-for-you breakfast options, check out these incredible Mocha Overnight Oats or these no sugar Double Chocolate Banana Muffins!

    When you give these Gluten-Free Pumpkin Muffins a try, leave me a comment below, rate them, and don’t forget to tag me on Instagram @lisa.m.coop! I would love to see you enjoying them!

    Print
    clock clock iconcutlery cutlery iconflag flag iconfolder folder iconinstagram instagram iconpinterest pinterest iconfacebook facebook iconprint print iconsquares squares iconheart heart iconheart solid heart solid icon

    Gluten-Free Pumpkin Muffins


    • Author: Lisa
    • Total Time: 30 minutes
    Print Recipe
    Pin Recipe

    Description

    These decadent, no sugar gluten free pumpkin muffins will be a hit in your house on those busy weekday mornings!


    Ingredients

    Scale

    3 ripe bananas, mashed

    1/2 cup pumpkin puree

    1/4 cup almond butter

    1 egg

    1 tsp vanilla

    1 1/2 cup almond flour

    1 tsp baking soda

    1/2 tsp cinnamon

    1/4 tsp salt


    Instructions

    1. Preheat oven to 350 degrees.
    2. Combine mashed bananas with almond butter, pumpkin, egg, and vanilla in large mixing bowl, and mix well.
    3. Combine almond flour, baking soda, cinnamon and salt in medium mixing bowl and stir.
    4. Add flour mixture to banana and pumpkin batter and mix well.
    5. Bake for 18-22 minutes until done. Let cool completely.

    Notes

    Search "Lisa Coop Pumpkin Banana Muffins" in My Fitness Pal to track these macros.

    • Prep Time: 10 minutes
    • Cook Time: 20 minutes

    Nutrition

    • Serving Size: 1 muffin
    • Calories: 88
    • Fat: 5
    • Carbohydrates: 10
    • Protein: 3

    Did you make this recipe?

    Share a photo and tag us — we can't wait to see what you've made!

    Air Fryer Citrus Chicken Tenders

    Sep 16, 2021 ·

    The inspiration for these air fryer chicken tenders came from my 21 day no sugar challenge. The whole idea started with the marinade. I often use a similar marinade recipe, but it contains honey which was off limits for the challenge. Therefore, I needed to tweak that recipe a little. To say I am pleased with the tweaking is an understatement! It is delish!

    The Ingredients

    With just a few simple ingredients, you can whip up this marinade. Grab some chicken tenders and have yourself a super quick and versatile protein to grab for any meal! The marinade is a mixture of ingredients you likely keep on hand. The ingredients you will need for the marinade are apple cider vinegar, avocado oil, oranges, limes, minced garlic, and cilantro. I use dried cilantro for convenience, but you can certainly use fresh cilantro. Avocado oil is my favorite cooking oil, but could also use extra virgin olive oil, or another oil you have on hand.

    It is crazy how so few, basic ingredients can provide SO. MUCH. FLAVOR.

    Watch Me Make It

    After you combine the ingredients for the marinade, pour it into a ziploc bag with your chicken. This recipe makes plenty of marinade for up to 2 pounds of chicken. After you combine the chicken and the marinade in the ziploc bag, secure it, and refrigerate until you are ready to cook. I usually try to let it marinate for at least two hours, but you can also refrigerate overnight.

    How to Cook Air Fryer Chicken Tenders

    When you are ready to cook your chicken, preheat your air fryer to 400 degrees. I let mine preheat for 2-3 minutes. Cook the tenderloins for 10 minutes at 400 degrees.

    These air fryer chicken tenders are perfect to keep on hand throughout the week to toss on salads, in wraps, throw into soups, or just enjoy alone with a good dip! Keeping ready to grab proteins on hand throughout the week is one thing that helps to keep me on track, as well as simplify my busy weeks!

    If you need another recipe for another option for a quick protein grab, check out these protein packed turkey sausage egg muffins!

    When you give these chicken tenders a try, leave me a comment below, rate them, and don’t forget to tag me on Instagram @lisa.m.coop! I would love to see you enjoying them!

    Print
    clock clock iconcutlery cutlery iconflag flag iconfolder folder iconinstagram instagram iconpinterest pinterest iconfacebook facebook iconprint print iconsquares squares iconheart heart iconheart solid heart solid icon

    Air Fryer Citrus Chicken Tenders


    • Author: Lisa
    • Total Time: 20 minutes
    Print Recipe
    Pin Recipe

    Description

    These simple chicken tenders will create a burst of flavor in your everyday meals!


    Ingredients

    Units Scale
    • 2 lbs chicken tenderloins
    • 2 oranges, juiced
    • 2 limes, juiced
    • 1/4 cup apple cider vinegar
    • 1/4 cup avocado oil
    • 1 tbsp minced garlic
    • 1 tbsp cilantro
    • 1 tsp salt
    • 1 tsp pepper

    Instructions

    1. Mix all the marinade ingredients together, and whisk until mixed well.
    2. Pour marinade into gallon sized ziploc bag, place chicken in ziploc bag with marinade and securely close.
    3. Allow to chicken to marinate for at least 2 hours, up to overnight.
    4. When you are ready to cook the chicken, preheat air fryer to 400 degrees for 2-3 minutes.
    5. Air fry the tenderloins at 400 degress for 10 minutes, flipping half way through. Enjoy!

    Notes

    Search "Lisa Coop Air Fryer Citrus Chicken Tenderloins" in My Fitness Pal for macros.

    • Prep Time: 10 minutes
    • Cook Time: 10 minutes
    • Category: Appetizer, Main Course, Salad, Snack
    • Cuisine: American, Italian, Mediterranean, Mexican

    Nutrition

    • Calories: 184
    • Sodium: 331
    • Fat: 7
    • Carbohydrates: 6
    • Protein: 26
    • Cholesterol: 55

    Keywords: air fryer, air fryer chicken, air fryer chicken tenderloins, chicken marinade, chicken tenderloins, citrus chicken tenders, marinade, summer chicken

    Did you make this recipe?

    Share a photo and tag us — we can't wait to see what you've made!

    For more recipes, check out my Simply Tasteful E-Cookbook!

    Coconut Lime Chicken

    Sep 10, 2021 ·

    Super easy, this one pan meal is a family favorite. This macro-friendly bowl of coconut lime chicken is comfort food. Creamy, satisfying and full of healthy fats. It feels like an indulgence. So delicious and easy to manipulate macros by swapping out the bases. Coconut milk - I mean who wouldn't love it!

    Super easy, this meal is a family favorite. This coconut lime chicken bowl is comfort food. Creamy, satisfying and full of healthy fats.

    Having tasty but easy to prepare meals on rotation for busy weeknights is key when you are trying to live a healthy lifestyle. Bowl eating is perfect for families because everyone can make their bowl just as they like it. Don't forget to make it fit your macros by choosing rice, potatoes, vegetables, or cauliflower rice.

    Coconut Lime Chicken Recipe

    Print
    clock clock iconcutlery cutlery iconflag flag iconfolder folder iconinstagram instagram iconpinterest pinterest iconfacebook facebook iconprint print iconsquares squares iconheart heart iconheart solid heart solid icon

    Coconut Lime Chicken


    • Total Time: 17 minutes
    • Yield: 4 1x
    Print Recipe
    Pin Recipe

    Description

    Oh so decadent, but macro friendly with it's fit fats. Comfort food in a bowl! One pan meal, makes kitchen clean up a breeze.


    Ingredients

    Units Scale
    • 3-4 chicken breasts (1lb)
    • 1 1/2 cups unsweetened coconut milk (full-fat)
    • 2 limes (juiced)
    • 1 onion
    • 1/4 cup cilantro (chopped)
    • 2 tbsp avocado oil (divided)
    • 1/4 cup chicken broth
    • 2 tsp minced garlic

    Instructions

    1. Use meat tenderizer to flatten chicken breasts sothey are even thickness. Heat 1 tablespoonavocado oil in skillet over medium heat. Seasonthe chicken breast with salt and pepper, then cook 3-4 minutes on each side until golden brown.
    2. Remove chicken from pan, set aside on plate. Add 1 tablespoon avocado oil to pan and cook onions until translucent. Add in garlic and cook for 1-2 minutes.
    3. Add coconut milk, lime juice, and chicken broth to pan and stir.
    4. Return chicken breasts to the pan, cover and simmer on low heat about 5 minutes until chicken is done.
    5. Serve with rice, potatoes, vegetables, or cauliflower rice.

    Notes

    Search MFP for “Fat Loss Mama Coconut Lime Chicken”


    • Prep Time: 5 minutes
    • Cook Time: 12 minutes
    • Category: Main Course
    • Cuisine: Mexican

    Nutrition

    • Calories: 355
    • Fat: 21
    • Carbohydrates: 8
    • Protein: 21

    Keywords: low carb, low carb mexican, one pan meals

    Did you make this recipe?

    Share a photo and tag us — we can't wait to see what you've made!

    If you give these add this Coconut Lime Chicken to your dinner prep, leave a comment below, rate them, and don’t forget to tag a picture @fatlossmama on Instagram!

    For more recipes, check out the Simply Tasteful E-Cookbook!

    Weight Loss Non-Negotiables to Feel Your Best.

    Aug 25, 2021 ·

    Non-negotiables - Do you have a list? 

    The hardest time to stick to living a healthy lifestyle is when life gets in the way. Identifying a list of weight loss non-negotiables allows you to keep a minimum baseline of health and wellness when your schedule gets busy or you find yourself in a season that’s emotionally heavy. Actually, a good thing to note... is that everyone's list will be a little different based upon personal values and goals. 

    how to use non-negotiables to stay well, prevent disease & feel your best

    When thinking about creating your own list of weight loss non-negotiables, you need to remember they can't be things you think you SHOULD be doing. They need to be things you know you can do no matter how crazy your schedule gets or no matter how tired you feel.

    So remember to be realistic! 

    When we keep promises to ourselves, we find confidence and momentum! 

    20 ideas for weight loss non-negotiables

    Choose Weight Loss Non-Negotiables

    So, if you are dealing with a busy schedule, a new routine, or life change, pick 3 - 5 non-negotiables and track those each week so you can see your progress. Once life slows down a bit, then that's a great time to find ways to level up your habits. But until then, just keep choosing progress over perfection! 

    Pro-Tip: Track your habits so you SEE how you are progressing. Fat loss and wellness is a LAG measure. And that means you have to do the things, often way longer than you really think, to begin seeing the results you are after. Also, tracking your habits lets you see how you are doing! So use this habit tracker below and track your progress.

    habit tracker for fat loss
    Habit TrackerDownload

    So if eating well is on your list of non-negotiables, be sure to check out these Taco Stuffed Zucchini Boats. You’ll hit your protein and veggie goals -  awesome self-care for sure! 

    Taco Stuffed Zucchini Boats

    Jul 16, 2021 ·

    When Taco Tuesday rolls around and you need a low-carb option, THIS is the recipe you want! I gotta be honest, I waited a long time before I jumped on the taco stuffed zucchini boats train. At first, I was super skeptical and just thought the whole idea was a little awful but HOT DANG!! So it turns out, I was missing out, man!

    Taco Stuffed Zucchini Boats

    Taco Stuffed Zucchini Boats Ingredients

    Needing only four ingredients to make these makes them an instant winner. All you need is zucchini, ground beef, rotel, and taco seasoning (i use my super easy homemade taco seasoning). These little gems are delicious and super easy to customize to your liking! I love to load mine up with a little cheese, sour cream, pico, cilantro, and of course the best part, GUAC! So if you're looking for a meal low on carbs, but not short on flavor, here it is!

    Ideas for toppings:

    • Pico de gallo
    • Shredded cheese
    • Cojita cheese
    • Guacamole
    • Salsa
    • Sour cream
    • Black olives
    • Cilantro

    If you give these zucchini taco boats a try, leave a comment below, rate them, and don’t forget to tag a picture @fatlossmama on Instagram! I would love to see you enjoying them!

    Taco Stuffed Zucchini Boats

    Print Pin
    Course: Main Course
    Cuisine: Mexican
    Keyword: Easy dinner, low carb
    Prep Time: 10 minutes
    Cook Time: 20 minutes
    Servings: 4
    Calories: 311kcal

    Ingredients

    • 4 zucchini
    • 1 pound ground beef (85% fat)
    • 1 can Rotel
    • 1 pack taco seasoning or make my homemade taco seasoning
    • olive oil spray
    • salt
    • pepper

    Instructions

    • Preheat oven to 400°.
    • Slice zucchini in half, lengthwise, then scoop out seeds and hollow it out just a little.
      4 zucchini
    • Line baking sheet with parchment paper and place zucchini halves on the baking sheet, then spray zucchini with olive oil spray and season with salt and pepper.Place in preheated oven for 10 minutes.
      olive oil spray, salt, pepper
    • While zucchini is in the oven, brown the ground beef. Drain the beef, return to pan and add the Rotel and taco seasoning. Simmer 2-3 minutes to combine all the flavors.
      1 pound ground beef, 1 can Rotel, 1 pack taco seasoning or make my homemade taco seasoning
    • Remove zucchini from oven, and stuff with the beef taco mixture. Return to oven and bake for 20 minutes. Top with your favorite Mexican toppings and enjoy!

    Notes

    For easy macro tracking, search the My Fitness Pal app for "Lisa Coop Taco Stuffed Zucchini Boats"

    Nutrition

    Serving: 2halves | Calories: 311kcal | Carbohydrates: 7g | Protein: 23g | Fat: 17g | Fiber: 2g

    Protein Packed Turkey Sausage & Pepper Egg Muffins

    Jun 18, 2021 ·

    Protein is such an important macronutrient for many reasons, and sometimes it can be difficult for us to reach our daily goal, especially when we are constantly on the go. I love to make these egg muffins most weeks for a quick option that is easy to grab whether you are working outside the home OR staying busy at home with the kiddos!

    Turkey Sausage & Pepper Egg Muffins

    These are perfect to make ahead for busy school mornings too! And the best part is they are super customizable! Feel free to change up the ingredients and play around with anything that you and your family enjoys!

    Ideas for add-ins:

    • Onions
    • Bacon
    • Cheese
    • Mushrooms
    • Spinach
    • Tomatoes
    • Ham
    • Broccoli

    The possibilities are endless!

    How do I store these egg muffins?

    Pack them into airtight containers and keep them in the refrigerator for up to 5 days. Make a batch in advance and then heat them up in the microwave (usually 10-15 seconds in enough) when ready to eat!

    Can I freeze these muffins?

    Let the egg muffins cool completely, then wrap individually in plastic wrap and pop them in a freezer-safe zip-lock bag. They will last for up to 2 months.

    To reheat, unwrap from the plastic wrap and fold them in a damp paper towel. Heat in the microwave in 20 second increments until warmed through.

    Turkey Sausage & Pepper Egg Muffins

    If you give these egg muffins a try, leave a comment below, rate them, and don’t forget to tag a picture @fatlossmama on Instagram! I would love to see you enjoying them!

    Print
    clock clock iconcutlery cutlery iconflag flag iconfolder folder iconinstagram instagram iconpinterest pinterest iconfacebook facebook iconprint print iconsquares squares iconheart heart iconheart solid heart solid icon

    Turkey Sausage & Pepper Egg Muffins


    • Total Time: 35 minutes
    • Yield: 12 1x
    Print Recipe
    Pin Recipe

    Description

    I love making these easy to grab and go muffins for a quick protein option!


    Ingredients

    Units Scale
    • 12 eggs
    • 1/2 Tbsp avocado oil
    • 1 green bell pepper (diced)
    • 16 oz ground turkey sausage
    • 1 tsp kosher salt
    • 1/2 tsp garlic powder
    • 1/2 tsp black pepper

    Instructions

    1. Preheat oven to 350. Heat oil over medium heat, then sauté diced bell pepper until tender. Remove peppers from pan and brown turkey sausage in same pan.
    2. Whisk together eggs, bell pepper, salt, garlic powder and pepper while sausage is cooking.
    3. Spoon turkey sausage into a 12-muffin pan. I put about 2 Tbsp sausage in each muffin cup. Then pour egg mixture into the muffin tin with the sausage.
    4. Bake at 350 for 20 minutes and enjoy!

    Notes

    Search MFP for “Fat Loss Mama Turkey Sausage Egg Muffins”

    • Prep Time: 15 minutes
    • Cook Time: 20 minutes
    • Category: Breakfast, Side Dish, Snack
    • Cuisine: American

    Nutrition

    • Calories: 114
    • Fat: 8
    • Protein: 11

    Keywords: egg, egg muffin, green pepper, protein, protein muffin

    Did you make this recipe?

    Share a photo and tag us — we can't wait to see what you've made!

    Did you like my egg muffin recipe? I have more healthy food recipes for you. Check them out here.

    • Go to page 1
    • Go to page 2
    • Go to Next Page »

    Primary Sidebar

    Hi, I'm Lisa! An RN turned full time macro coach and food blogger. I love creating simple, macro friendly recipes that my family will actually eat WITH me, and sharing those with you!

    More about me →

    Popular

    • Surviving Summer Series - Work Out Edition
    • Cardio could be preventing your fat loss. Are you guilty?
    • 3 Ways to Love Yourself Leaner
    • Ground Turkey Sweet Potato Skillet

    Grab My Cookbook!

    Footer

    ↑ back to top

    About

    • About

    Newsletter

    • Sign Up for the latest recipes

    Contact

    • Contact

    Copyright © 2021 Lisa Coop